" /> CraftyGoat's Notes: January 2007 Archives

« December 2006 | Main | February 2007 »

January 30, 2007

Read on for the January 2007 edition of the Crafty Goat newsletter, which includes sweepstakes winners, new products, and other reasons to celebrate.

CONTEST WINNER ANNOUNCED

Lisa L. of Waterbury, Vermont, was the latest winner in CraftyGoat.com’s monthly sweepstakes. Lisa won a $25 Gift Certificate. Congratulations!

Are you one of those people who always buys birthday and holiday cards in a last-minute dash to the corner store? If so, don’t miss our January drawing. One lucky winner will receive a year’s worth of greeting cards — 12 handmade greeting cards covering various holidays and special occasions. It’ll save you time and gas — plus your loved ones will just love getting these handmade cards. Entry deadline is January 31st. Visit http://www.craftygoat.com/entry.php.

UPCOMING HOLIDAYS

February 14th is coming, and you know what that means… don’t you? Well, it’s time to celebrate Ferris Wheel Day, of course!

Along with Ferris Wheel Day, here are a few other holidays you might not be prepared for:

  • February 9 - Toothache Day
  • February 11 - Don’t Cry Over Spilled Milk Day
  • February 16 - Do A Grouch A Favor Day
  • February 23 - International Dog Biscuit Appreciation Day

Click here for more bizarre American holidays. Or come take a look at CraftyGoat.com if you need gift ideas for some of the more traditional February holidays.

NEW ON CRAFTYGOAT.COM

Love turquoise jewelry? Check out our latest products featuring faux turquoise.

RECENT POSTS ON OUR BLOG

Our blog, Crafty Goat’s Notes, gives tips on crafts and crafting. Here are some of the topics we’ve covered in the past month:

  • How to Make Polymer Clay Resolution Reminders
  • How to Get Rid of Streaks (Without Cleaning your Pasta Machine)
  • Other Ways to Use Alcohol with Polymer Clay

The blog address is: http://blog.craftygoat.com

CLEARANCE SALE - WHILE SUPPLIES LAST

Our clearance items are now at 70% off. Don’t miss your last chance at these great deals! See http://craftygoat.com/specials.php.

January 22, 2007

Rubbing alcohol
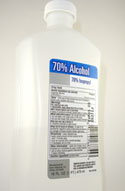
Removing pasta machine streaks isn't the only thing rubbing alcohol is good for. Here are a few other handy ways to use isopropyl alcohol with polymer clay:

  • Use rubbing alcohol to clean your work surface and clay tools -- including pasta machines, clay molds, and paint brushes (after using liquid clay).
  • Spread rubbing alcohol over the back of your paper for a better image transfer.
  • Smooth alcohol lightly over clay before baking to help get rid of fingerprints.
  • Use baby wipes soaked in rubbing alcohol to clean clay residue (especially that pesky red!) off hands.
  • When making mosaics from baked tiles, use a Q-tip and rubbing alcohol to scrub liquid clay "grout" off the tiles before baking again.
  • Clean any greasy residue off baked clay before applying a glaze finish.

Sounds like rubbing alcohol has earned its spot on the craft room shelf... Can you think of other ways you've used rubbing alcohol with polymer clay?

January 14, 2007

Pasta Machine Streaks - Before and AfterI admit it... I've got a dirty pasta machine. And a dirty pasta machine sometimes means I get dark streaks on my white polymer clay.

There's some obvious solutions -- ya know, like cleaning the pasta machine. There's also work-arounds, like running a baby wipe or some scrap clay through the machine first. But what if, despite your best efforts, you still get streaked clay?

Last week, Victoria James of Victoria James Art posted a solution to this problem on the Polymer_Clay_People Yahoo! group. Turns out that since those streaks are just on the surface, they wipe right off. Pour some rubbing alcohol onto a paper towel or baby wipe and just rub the streaks off the raw clay... Easy as that!

Thanks for the great tip, Victoria. Maybe now I can take "cleaning the pasta machine" off my list of things to do this year!

January 8, 2007

Time Resolution Reminder

We're a week into the new year -- how are those resolutions coming along? If you need a little reminder to keep you on track, try these easy polymer clay resolution reminders. Make them into magnets, bookmarks, or whatever works best for reminding you about what you want to do.

Step 1: Print It

Use word processing software to format your resolution in a font and style you like. You might want to study a product like Quote Stacks to get ideas for formatting -- for example, make key words larger, use shadow effects, etc. Once you're happy with your quote, print it to a laser printer, or copy it using a toner-based copier. Don't forget it needs to be in mirror image.

Step 2: Transfer It

This is the method I use for polymer clay image transfers.

Polymer Clay Image TransferPolymer clay with alcohol-soaked transfer on top

  • Cut out the image to be transferred, leaving a little white space around it. This makes it easier to peel the paper away from the clay later.
  • Use a pasta machine (or rolling pin / brayer) to roll out a sheet of conditioned polymer clay at least as large as the transfer. Thickness of the sheet depends on how you want to use it: thin long sheets make great bookmarks, while thicker sheets are sturdier for magnets or stand-alone plaques.
  • Place the transfer face down on the clay. To avoid smudges, be careful not to move it once it's in place. Smooth the paper down to insure all the ink is in contact with the clay. Then apply a small amount of rubbing alcohol or gin to the back of the paper -- still being careful not to move the paper. Let the alcohol dry, then apply more and allow it to dry again.
  • Carefully peel the paper off, a little at a time. If the paper seems to be sticking to the clay, try applying more alcohol (don't let it dry this time) before continuing to peel.

Step 3: Make It Original

Add some embellishments to make it your own:

Food Resolution Reminder "Food" Resolution Reminder with polymer clay fruits and veggies

  • Add something that matches your resolution's theme -- for example, I added some yummy-looking fruits and vegetables to the food resolution.
  • Borders add a touch of class. I used Shade-Tex texture sheets to create a textured margin on mine. Then after baking, I rubbed on Rub 'n Buff (for the time resolution) and acrylic paints (for the food resolution) in the textured area.
  • You're not limited to clay. Use bottle-caps, fibers, beads, or pretty much anything else. If you're concerned that something might not be oven-safe, wait and glue it on after the baking is done.

As you're working, be careful not to touch the transfer -- the ink can still smudge until you bake it.

Step 4: Bake & Use It

Bake the clay according to the manufacturer's instructions. If there's any warping during the baking process, you can place it under something heavy while it cools.

After it's cooled, glue a magnet to the back (I use super glue) and put it on your refrigerator. Or prop it up somewhere you'll see it often. I have several plaques propped up along the edge of my shower -- since the transfers are water-proof, it's a great place to get a daily reminder.

A couple of extra tips:

  • Since these transfers can be large, it's easy to trap air bubbles between the paper and the clay. This is a problem since the ink won't transfer if it's not completely touching the clay. To avoid air bubbles, try starting in the middle and smoothing outwards. If there's a stubborn wrinkle, see if you can nudge it into a space between words to minimize the problem. Or, make it easier on yourself and cut the paper into smaller segments before you transfer.
  • Having trouble transferring? Another method that often works well is to put the clay and paper together into the oven, then let it cook for 3-5 minutes before peeling the paper off. Put the clay back in the oven to finish curing.
  • If you're still having trouble with transfers, don't get frustrated. There's a ton of things that can affect their success. Let me know if you have a question -- or check out these handy resources:

Not only are the reminders themselves helpful -- but I think just the process of making them reinforces your resolution. As you spend time on the project, you're really committing yourself to your goal. And thinking about how to format it and what embellishments to add can help you think through what the resolution really means to you.

Best of luck with your goals!

January 1, 2007

Blue and white polymer clay Polymer Clay Central has announced their January 2007 Challenge theme: Blue and White. Mail your entries in by January 15, 2007, for a chance to win one of three gift certificates to Clay Factory.

I love the broad themes they use for their challenges. It allows you to interpret the challenge any way you want -- plenty of creative liberty. I always enjoy looking at the entries people send in and voting for my favorite.

But even though I love the idea, I've never actually entered a challenge. It's one of those things that sounds like fun, but I've never gotten around to it. I think I'll make it a goal for the New Year to enter at least a few times.

What about you...? What kind of crafty goals do you have this year?

About this Site

CraftyGoat's Notes is all about sharing polymer clay tips & tricks that have worked for me. (And even a few that haven't!)

Read more about CraftyGoat's Notes...

Buy My Book

Archives

Enter your address to get CraftyGoat's Notes by email:

Delivered by FeedBurner