" /> CraftyGoat's Notes: October 2007 Archives

« July 2007 | Main | November 2007 »

October 29, 2007

Pumpkin - All Wrapped UpTo wrap up my pumpkin series, I wanted give you a few tips & tricks -- things that didn't fit anyplace else...
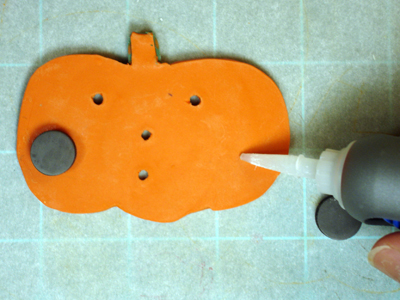
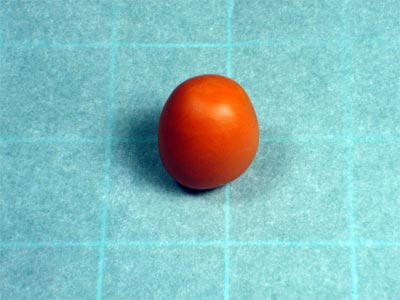
  • Pumpkin Faces: Looking for ideas or patterns for carving your pumpkin's face? Check out Adam Kalsey's list of free pumpkin carving patterns. These are great to use for inspiration -- or you can try shrinking them down to use as an image transfer or stencil.
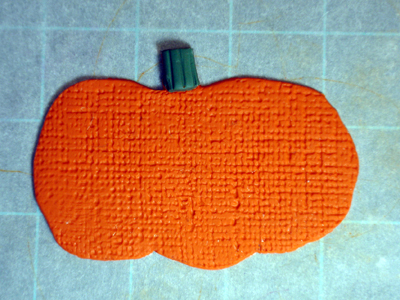
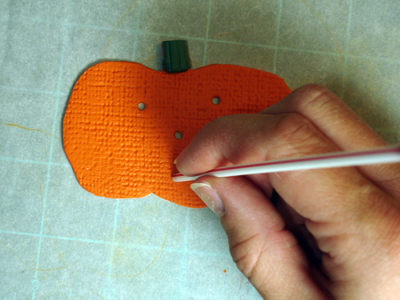
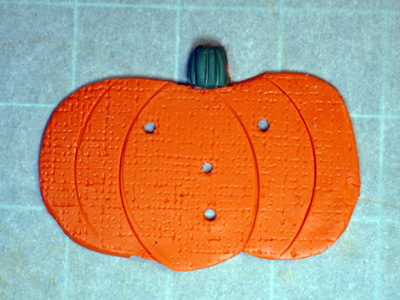
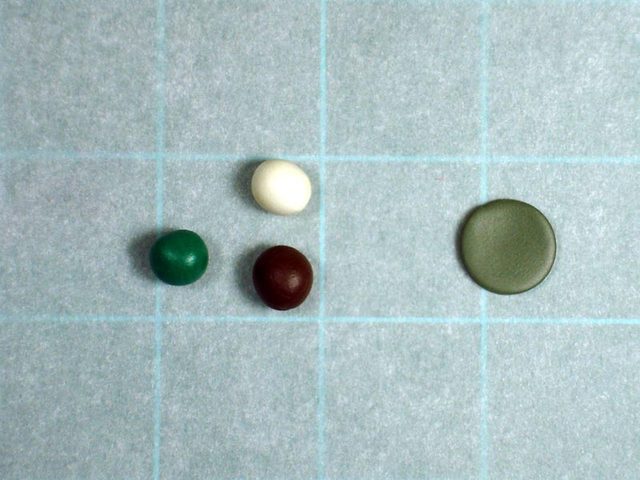
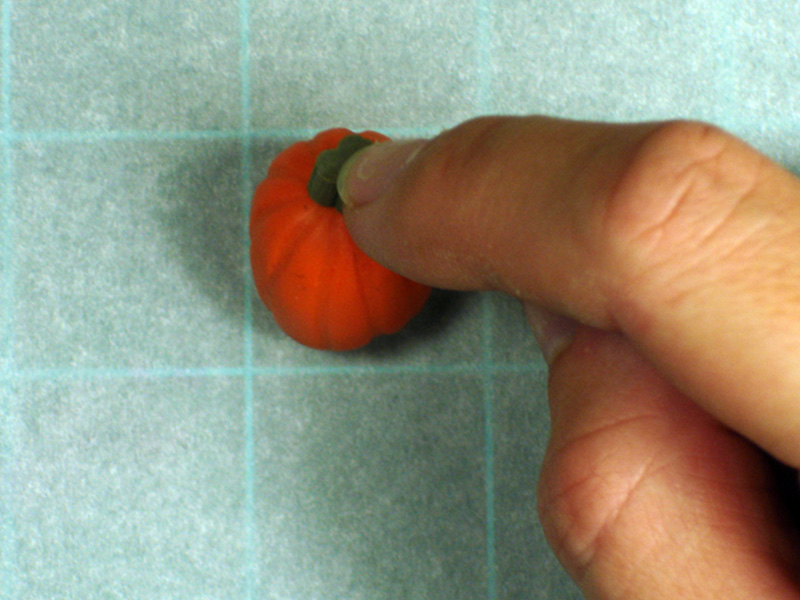
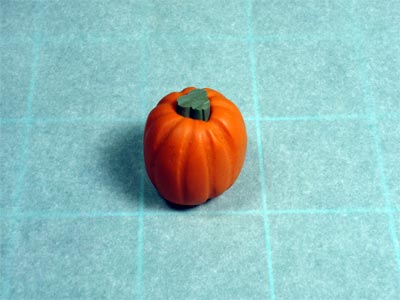
  • Stems. Curled green wire works great for pumpkin stems. Or for a natural touch, try using a small twig.
  • Pumpkin Patch Sign
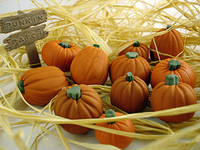
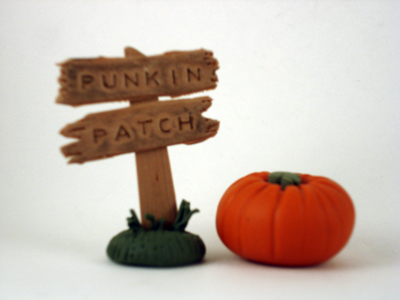
Personalizing your Pumpkin Patch. If you're making a patch full of pumpkins, consider making a sign to stake your claim (or if you've got little ones, they'll really love seeing their names on the sign!). It's easy to do...
    1. Punching label for sign
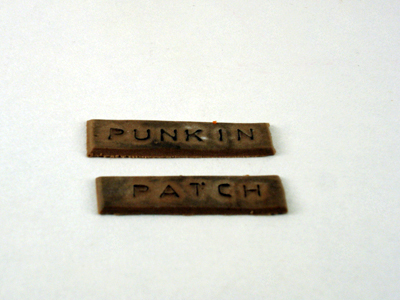
Use a label maker to punch out the desired name.
    2. Pressing label into clayPress the label, face UP, onto a sheet of clay. Burnish sufficiently to transfer the letters' details, but be careful not to move the clay & blur the impression.
    3. Finished sign pieces
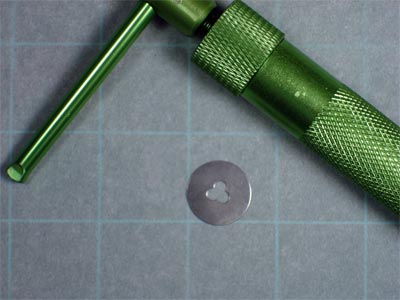
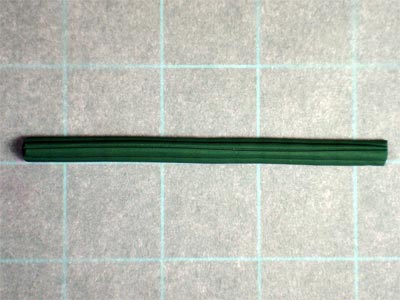
Trim the words, weathering the edges if desired. I like to use my finger to add chalk to the raised letters, to give them a little more definition. Now attach these to a thicker clay pole... & you've got yourself a pumpkin patch sign!
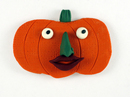
Finally, here's a few links to follow if you're looking for more pumpkin fun:

I hope you've enjoyed the polymer clay pumpkin series -- & I hope you make yourself a few pumpkin friends in time for Halloween. Have fun!

Polymer Clay Pumpkin Series:

October 24, 2007

Friendly Mr. Pumpkin HeadYour kids will love switching out the interchangeable eyes, nose & mouth on this refrigerator magnet jack-o-lantern -- but I'm betting you'll have just as much fun making it as they will playing with it!

Materials

  • MaterialsPolymer Clay: Orange (< 1/4 pkg) for pumpkin, plus assorted other colors for facial features. I strongly recommend not using "Sculpey" clays for this, since the all handling & poking may cause it to tear. I prefer Premo, but other strong brands like Fimo or Kato would work too.
  • Tools:
    • Pasta machine or brayer
    • Straw for punching holes
    • Super glue (I like Loctite brand)
    • Texture sheet (optional). I used ShadeTex's "Linen" texture
  • 1-2 magnet(s)
  • 10-20 brads

Instructions

  1. Cut out pumpkin shapeRoll your orange clay out into a large sheet. I rolled mine to the third thickest setting on my pasta machine. Print a pumpkin template (here's mine) and trace around it with a knife, or cut out a pumpkin shape freehand.
  2. Textured pumpkin with stemTexture (if you want) by pressing the texture sheet onto the clay and pressing it in with a brayer or your fingers. Add a stem (I used a leftover piece of stem from my previous pumpkin post).
  3. Poking holes in pumpkin with strawUse a small straw (coffee stirrers work well) to punch mouth, nose, and eye holes in your pumpkin. You'll want to make sure the hole is big enough that your brad fits through. Carefully consider the hole placement -- if you plan to make large noses, for example, you'll want to leave plenty of room between the nose & mouth holes. (I wish I'd left a little more room between these holes on mine.)
  4. Lines addedUse a toothpick (or the blunt edge of a cookie cutter, or anything else you have handy!) to add a few curved lines to the pumpkin.
  5. Making round eyes from black clay sheetThis is where things get fun. Start making faces -- pumpkin faces, that is! You can use your brad's head as a guide, making sure your pieces are big enough to hide its top. For pieces you want to be relatively flat, I recommend cutting them out & baking them, then gluing them onto the brads with super glue.

    Molding clay eyeballs onto bradFor pieces that are more 3-D (like eyeballs or larger noses), you can build and bake them straight on the brad.

    Face parts ready to bakeCreate several eyes, noses & mouths for your pumpkin.

  6. Gluing brad onto eyeBake according to your manufacturer's recommendations. Once everything has cooled, start attaching the brads with super glue. I sanded the tops of my brads a bit first, to roughen them up, then applied a dot of glue to both the brad and the clay piece. I tried to line up my brads so that the legs would be opening to the sides, instead of up & down. This makes it a little easier to keep the brads from running into each other on the back (& from showing around the edges) -- but it's not mandatory. You can always use scissors or wire cutters to snip the legs if there's a problem.
  7. Gluing magnet to pumpkinUse super glue to attach magnet(s). Don't use really thin magnets -- you don't want your refrigerator getting scratches from the brads. I used two magnets and put them on the outer edges so they didn't get in the way of the brads.
  8. Ms. Pumpkin Head with Witch NoseNow it's time to play -- er, I mean, test that all the combinations fit together. If you find that your nose is too big, you can always make a smaller one! (Not that easy in real life, eh?)

Hope you enjoy making your own jack-o-lantern magnet. If you want to take it to the next level, check out macaroniandglitter's instructions for decorating your full-size pumpkin with Mr. Potato Head-style accoutrements. And stay tuned here for more pumpkin fun!

Polymer Clay Pumpkin Series:

October 22, 2007

My Little Pumpkin PatchMaking polymer clay pumpkins is simple -- and they make for a quick & easy Halloween decoration. This week, I'm going to give you a few tips on creating your own pumpkins, starting with the basics:

Making a Simple Polymer Clay Pumpkin

Materials

  • Polymer Clay: (I prefer Premo brand)
    • Orange & green (required)
    • Brown & white (optional)
  • Tools:
    • Toothpick or other pointy-stick tool
    • Clay gun (optional)

Instructions

  1. Pumpkin colorsMix & condition your clay. Premo's orange is a nice pumpkin color right out of the package, but I added a pinch of brown and white to mine to get a softer shade. You'll want to condition a 3/4" - 1" ball of orange for each pumpkin.

    Stem colorsYou'll also need a little green-ish clay for the stems. I used equal parts green, brown & white for my stem -- but plain old green would work fine too.

  2. Clay gun with disk Start with the stem. (You were expecting me to start with the pumpkin, weren't you? Nope. We're starting with the stem, & I'll tell you why in a minute.)

    There's a couple of ways to make a stem. If you have a clay gun, use the pictured disc to extrude a long green snake. (I like to add a couple of extra indentions on the sides.) If you don't have a clay gun, roll your clay into a long snake & use your toothpick to add some texture to it.

    Bake StemOnce you have a long thin stem log, you're ready to put it in the oven. Don't cut it to size yet! Let this bake according to the manufacturer's directions while you start working on the pumpkin.

    The reason I recommend baking the stem first is to make it easier to push it into the pumpkin later without distorting it. Plus it works especially well if you're making multiple pumpkins -- you can bake one long (1-2") stem and slice off a piece for each pumpkin. BUT if you're short on time -- or just don't want to mess with two baking cycles -- you can skip this bake and set your stem aside for now.
  3. Shape the pumpkinShape your pumpkin. Roll your clay into a pumpkin shape. Pumpkins come in all sorts of shapes, so anything goes here!
  4. Make lines on pumpkin Add lines. Press the tip of your toothpick into the center of the top, then roll the toothpick straight down, pressing against the side. Repeat all around the pumpkin. You might want to study a real pumpkin or pumpkin photo first to make your lines more realistic. To me, the lines look like fabric, gathered at the top. They're deeper close to the stem, then fade out as they get further away.
  5. Push in the pumpkin stem Add the stem. Use a sharp blade to cut through your stem log. Then press the stem into the top of the pumpkin. If you're using a baked stem, you'll notice that just pressing the baked clay into the unbaked pumpkin creates a nice, realistic indention. You'll also be able to press the stem in without worrying about distorting it. If you're using an unbaked stem, though, you can always fix distortions by re-shaping it once it's in place.
  6. Finished PumpkinBake.

If you're making a whole pumpkin patch, consider varying shapes & sizes. You might also try varying the amount of white you add to your clay mix, so you end up with slightly different shades on the pumpkins & stems. And remember, not every pumpkin in the patch is perfect... so if some of yours turn out crooked, it's more realistic!

Stay tuned for more pumpkin fun this week. And if you do make a pumpkin (or a whole patch of 'em), consider taking a photo for the Polka Dot Creations Color Challenge. But hurry -- the word on Lisa's blog is that she's picking the winner soon!

Polymer Clay Pumpkin Series:

About this Site

CraftyGoat's Notes is all about sharing polymer clay tips & tricks that have worked for me. (And even a few that haven't!)

Read more about CraftyGoat's Notes...

Buy My Book

Archives

Enter your address to get CraftyGoat's Notes by email:

Delivered by FeedBurner