
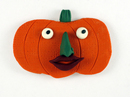
Meet Mr. Pumpkin Head
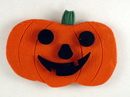 Your kids will love switching out the interchangeable eyes, nose & mouth on this refrigerator magnet jack-o-lantern -- but I'm betting you'll have just as much fun making it as they will playing with it!
Materials
 Polymer Clay: Orange (< 1/4 pkg) for pumpkin, plus assorted other colors for facial features. I strongly recommend not using "Sculpey" clays for this, since the all handling & poking may cause it to tear. I prefer Premo, but other strong brands like Fimo or Kato would work too.
- Tools:
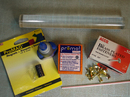
- Pasta machine or brayer
- Straw for punching holes
- Super glue (I like Loctite brand)
- Texture sheet (optional). I used ShadeTex's "Linen" texture
- 1-2 magnet(s)
- 10-20 brads

Instructions
-
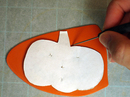 Roll your orange clay out into a large sheet. I rolled mine to the third thickest setting on my pasta machine. Print a pumpkin template (here's mine) and trace around it with a knife, or cut out a pumpkin shape freehand.
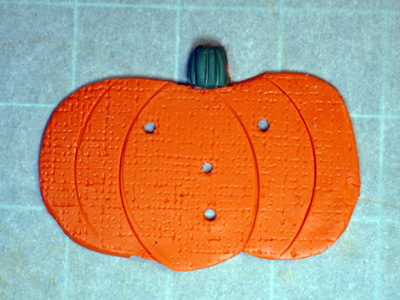
 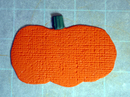 Texture (if you want) by pressing the texture sheet onto the clay and pressing it in with a brayer or your fingers. Add a stem (I used a leftover piece of stem from my previous pumpkin post).
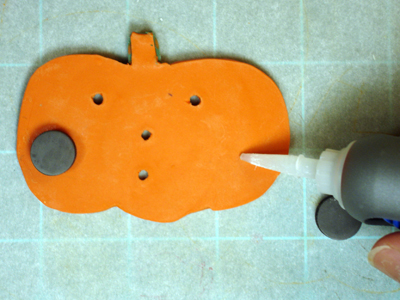
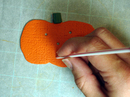 Use a small straw (coffee stirrers work well) to punch mouth, nose, and eye holes in your pumpkin. You'll want to make sure the hole is big enough that your brad fits through. Carefully consider the hole placement -- if you plan to make large noses, for example, you'll want to leave plenty of room between the nose & mouth holes. (I wish I'd left a little more room between these holes on mine.)
 Use a toothpick (or the blunt edge of a cookie cutter, or anything else you have handy!) to add a few curved lines to the pumpkin.
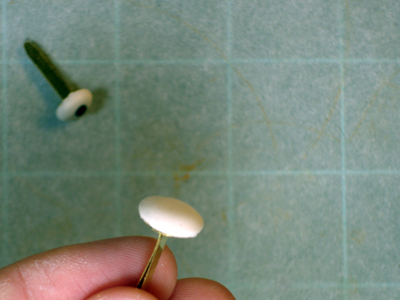
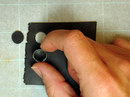 This is where things get fun. Start making faces -- pumpkin faces, that is! You can use your brad's head as a guide, making sure your pieces are big enough to hide its top. For pieces you want to be relatively flat, I recommend cutting them out & baking them, then gluing them onto the brads with super glue.
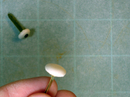 For pieces that are more 3-D (like eyeballs or larger noses), you can build and bake them straight on the brad.
 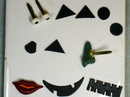 Create several eyes, noses & mouths for your pumpkin.
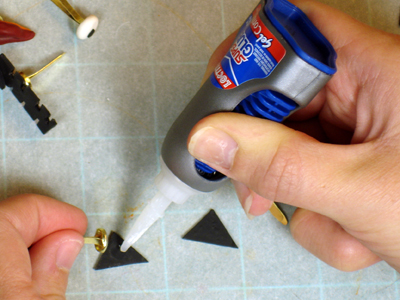
 Bake according to your manufacturer's recommendations. Once everything has cooled, start attaching the brads with super glue. I sanded the tops of my brads a bit first, to roughen them up, then applied a dot of glue to both the brad and the clay piece. I tried to line up my brads so that the legs would be opening to the sides, instead of up & down. This makes it a little easier to keep the brads from running into each other on the back (& from showing around the edges) -- but it's not mandatory. You can always use scissors or wire cutters to snip the legs if there's a problem.
 Use super glue to attach magnet(s). Don't use really thin magnets -- you don't want your refrigerator getting scratches from the brads. I used two magnets and put them on the outer edges so they didn't get in the way of the brads.
-
 Now it's time to play -- er, I mean, test that all the combinations fit together.
 If you find that your nose is too big, you can always make a smaller one! (Not that easy in real life, eh?)


Hope you enjoy making your own jack-o-lantern magnet. If you want to take it to the next level, check out macaroniandglitter's instructions for decorating your full-size pumpkin with Mr. Potato Head-style accoutrements. And stay tuned here for more pumpkin fun!
Polymer Clay Pumpkin Series:- How to Make Polymer Clay Pumpkins
- Meet Mr. Pumpkin Head
- How to Make a Light Bulb Pumpkin
- The Great Pumpkin Wrap-Up

Comments
Woohoooo! How Clever!!!!
That made me miss my Mr. Potato Head!
Posted by: April | October 24, 2007 10:57 PM
Same here, April. I felt like a kid, trying out all the various combinations while I was taking Flickr photos. I may have to start making more toys for myself! :-)
Posted by: Angela Mabray | October 28, 2007 1:36 PM