
How to make a Light Bulb Pumpkin
Q: How many crafters does it take to change a light bulb?
A: Just one -- but you better believe she's not just gonna throw away that old light bulb!
 Burned out light bulbs can be a wonderful base for making rounded vessels. Today I'll show you how to cover a light bulb with polymer clay to make a cool light bulb pumpkin.
Materials
- Polymer clay: Orange for the pumpkin; your choice of color(s) for the hat. I strongly recommend not using "Sculpey" clays for this, since we'll be flexing it & cutting into it after baking. I prefer Premo, but other strong brands like Fimo or Kato should work too.
- Translucent Liquid Sculpey (TLS)
- Light bulb
- Toilet paper roll
- Tools:
- Pasta machine or brayer
- Clay blade
- Toothpick or other texture tool
- Craft knife
Instructions
PUMPKIN
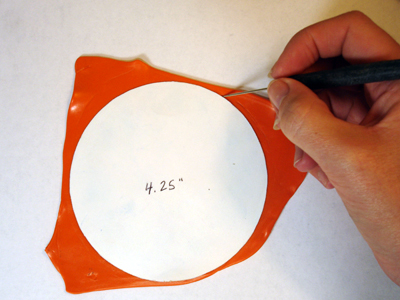
Polymer Clay Pumpkin Series: Condition orange clay (I used about 1/2 package) and roll it through the pasta machine to the second thickest setting. Use a cookie cutter or round template to cut out a large circle (mine was 4.25" in diameter).
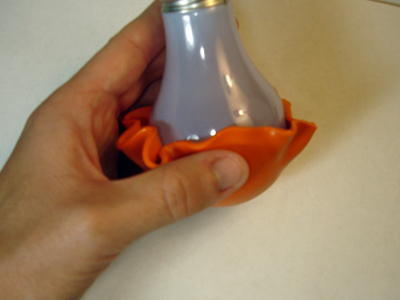
 Place a burned-out light bulb in the center of the orange circle. Evenly push the clay up around the bulb.
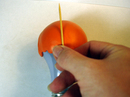 Use a toothpick or similar tool to texture the pumpkin (optional).
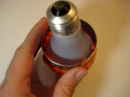 Trim the top edge to make it more even. The way I do this is to bring a 2.25" diameter cookie cutter down over the top of the light bulb, using it to mark an even cutting line around the top. I then use my clay blade to trim along that line.
-
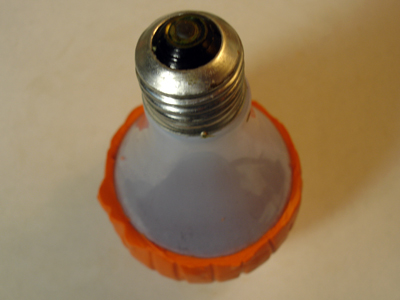
 Bake the pumpkin on the light bulb. Since I want my pumpkin to have a flat bottom to sit on, I baked it just like this. If you wanted a rounded bottom, you could put the light bulb's stem in a trimmed-down toilet paper roll, giving enough support to bake the pumpkin portion in the air.
Note: I did not have any trouble baking my light bulb at clay temperatures -- but if you're concerned, you may want to bake the light bulb uncovered first to make sure there are no problems. And of course you should always keep an eye on odd things you put in the oven!
Bake the pumpkin on the light bulb. Since I want my pumpkin to have a flat bottom to sit on, I baked it just like this. If you wanted a rounded bottom, you could put the light bulb's stem in a trimmed-down toilet paper roll, giving enough support to bake the pumpkin portion in the air.
Note: I did not have any trouble baking my light bulb at clay temperatures -- but if you're concerned, you may want to bake the light bulb uncovered first to make sure there are no problems. And of course you should always keep an eye on odd things you put in the oven!  Remove the pumpkin from the light bulb. There are two ways to do this.
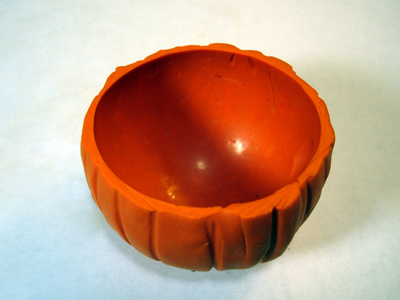
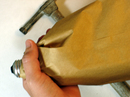 You can place the pumpkin & bulb in a paper bag, then use a hammer or other tool to smash the light bulb, rolling the pumpkin portion around enough to crush any bulb remaining inside it. Be sure to take all the necessary precautions if you do this, and carefully brush out all the glass shards before continuing.
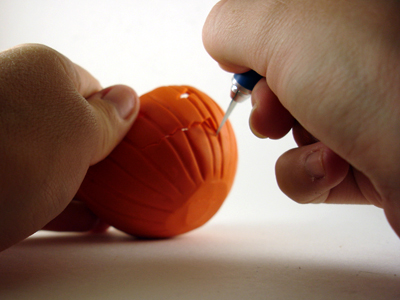
- OR, if you're not into intentionally breaking things, you can use a craft knife to cut a slit down the back side of the pumpkin. You only need to go about 3/4 of the way down, then carefully slide the pumpkin off the light bulb. Use super glue (I prefer Loctite Control Gel) to fix the slit. This method has the added benefit of allowing you to re-use the bulb for the next pumpkin.
 Use a craft knife to trim any remaining uneven top edges. Then carve a face in the pumpkin.


HAT
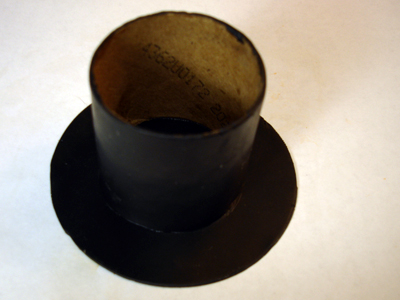
 To make a hat, start with a cut-down toilet paper roll. I spread a little TLS on the cardboard first, to help the clay adhere better. Cover the roll with a long, thin strip of clay, smoothing the seam where the clay meets.
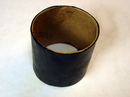 Trim the top and bottom edges with a clay blade.
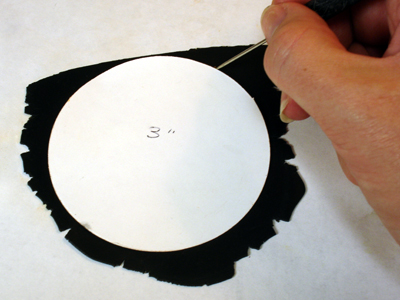
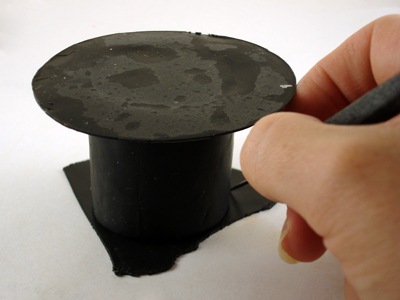
 Cut out a circular brim for the hat, making sure that it's large enough to fit on top of the pumpkin's head. I used a 3" circle template for mine.
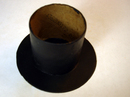 Spread a little TLS along the bottom edge of the tube section, then press it firmly into the brim. Bake and allow to cool.
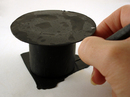 Spread some TLS around the open edge of the hat. Use the hat as a template to cut the top piece from a thin clay sheet. Smooth these together and bake again.


VARIATIONS
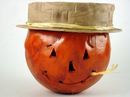 Try hats of different sizes & shapes. The "straw" hat was baked on a metal cookie cutter (which I removed after baking). Consider trying a witch's hat, chef's hat, or baseball cap.
- Try adding a sheet of glow-in-the-dark clay behind the face cutout (thanks to fellow guild member Cassy & soon-to-be-guild-member Nance for this idea). To help the somewhat transparent glow-in-the-dark clay really pop, try using a sheet of white behind it (thanks to Penni Jo for that tip!)
- Try a tiny LED light inside to imitate a candle. Or cut a hole in the bottom so you can feed a Christmas-light sized light through.
- How to Make Polymer Clay Pumpkins
- Meet Mr. Pumpkin Head
- How to make a Light Bulb Pumpkin
- The Great Pumpkin Wrap-Up

Comments
Great tute, Angela! You are quite the busy clayer. (I'm seriously jealous.) ;) You explain it all so well...the pictures are clear...and you even give alternative suggestions for us idea challenged people. You rock!
Posted by: Christie | October 29, 2007 11:11 AM
Thanks, Christie -- though I don't believe for a second that *you're* idea-challenged! I've really been having fun with my little pumpkin friends...
Posted by: Angela Mabray | October 29, 2007 12:00 PM