
Review: Amazing Mold Putty
 Today I'd like to talk about silicone mold putties in general, and Amazing Mold Putty in particular.
But first, a story...
Years ago, within months of using polymer clay for the first time, I took part in my first craft fair. It was a one-day show, part of a convention we were attending. I made some "pet rocks" out of polymer clay, added some googly eyes, & printed the name of the organization on an attached slip of paper. Viola! An inexpensive craft fair item.
(Let me say up front that it was way too early for me to be selling anything -- I didn't know nearly enough about working with clay. I was primarily using the big blocks of white Sculpey (with a little Sculpey 3 mixed in for coloring), if that tells you anything about my experience level. Those things never should have seen the light of day -- but I was sure proud of them at the time! But back to the story...)
Well, not only did I get a few smiles, & sell a few rocks -- but I was also approached by the owner of the organization's boutique & asked whether I'd make a bunch of them to sell in their magazine. I felt like I'd hit the jackpot! We thought about it & put together some (ridiculously-low) numbers for the guy, and he agreed to purchase 100 to resell.
Once I got home, I started worrying about how I could make 100 of these little things in the limited time I'd agreed to. So I volunteered my husband to help (the first of several times I've done this... I'm lucky he's such a good sport). But if he was getting involved, I wanted an easy way to mass-produce the 5 different styles in a way that didn't involve any previous polymer clay experience. Molds to the rescue!
I bought some Eraser Clay, & followed the steps I'd read about how to make your own molds. And while it did make the job a little easier than it would have been otherwise, we were dusting those molds with corn starch for just about every rock. And we still had trouble getting them out! It was a long job, and it definitely cured me of any illusions I had about mass-production work being glamorous.
Fast-forward to today. I've learned a ton about polymer clay since that first craft show (like not to use Sculpey & not to agree to really cheap labor!), and I've also learned that there are much better options for mold-making than Eraser Clay.
How Silicone Mold Putties Work
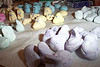
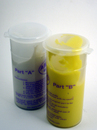 I've tried a couple of different brands of 2-part silicone mold putties, and in each case I've really liked what I've seen. The basics are the same regardless of the brand. When you purchase these products, you get two different colors of putty in separate containers. To use them, you mix the two colors together until they're blended, then you shape the combination over the item you want to make a mold of. Once the mold putty is set (setting time varies by brand), you peel it off whatever you molded, and it's ready to use.
At this point, you can use the mold just like you would any of the commercially available clay molds. One advantage of the silicone molds over commercial molds is that you don't need a release agent. The clay pops right out of the silicone. In fact, I've occasionally run into problems with the clay sticking to my fingers more than to the mold -- a little corn starch or talcum powder sprinkled on top of the molded piece helps with that.
Another advantage of silicone molds that I've seen touted -- and that may be useful to some of you -- is that many brands are oven-safe at polymer clay temperatures. This means you could bake your clay right in the mold. Of course, if you're like me & like to tweak your molded things before baking, this may not be a big benefit to you.
Amazing Mold Putty Specifics
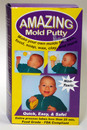
Now that we've covered some basics that apply to all silicone mold putties, here's a few reasons I like Amazing Mold Putty.Easy to Use: Aside from the vaguely creepy baby-molding photo on front, I found the product packaging on the Amazing Mold Putty extremely helpful -- they include very clear instructions along with a helpful photo showing how many molds you could expect to make from the kit. I feel like these details give the brand an edge over silicone mold putties that work great for polymer clay but are intended for something else (like the Mega-Sil ear molds). Especially if you're new to molds, having good instructions can really increase your confidence and probability of success.
Long-ish Setting Time: Amazing Mold Putty molds take 20-30 minutes to set (before they're ready to be used as molds). Some brands are much faster -- setting in 3-5 minutes. And while I've found that 20-30 minutes can seem like a long wait when I'm in the middle of a project, I think I prefer this longer setting time. The brands that set in 3-5 minutes have a much shorter working time too -- you need to get your item molded quickly. And if you mixed up too much molding material, it's unlikely you'll have time to mold something else with the extra. I like having a little more wiggle room with my molding, and I think the longer setting time is an acceptable trade-off.
Availability: Amazing Mold Putty is widely available, unlike some silicone mold putty products that are only available online. In fact, my local Michaels & Hobby Lobby stores both carry the 2/3 lb packages in the same aisle as the polymer clay. And I like this large package size -- it allows you to make a huge number of molds in a variety of sizes. But I do wish they also offered single-use packets, like the contact-lens type packets available in other brands. Not only are these handy for taking along on nature walks, to guild classes, etc -- but I think the $20 retail price for the large packages may seem like a big investment for someone new to molding.
If you're looking for a way to create shape and texture molds for use with polymer clay, I'd encourage you to give Amazing Mold Putty a try. It's a fun and easy-to-use product, and it'll make a good addition to your polymer clay tool kit.
Amazing Mold Putty Pros:
- Great instructions. Easy to use.
- Longer setting time allows a little more "wiggle room" before mold starts to set.
- Widely available at major craft stores.
- Oven-safe at polymer clay temperatures.
Amazing Mold Putty Cons:
- Longer setting time means you can't use the molds immediately.
- While a good value, the large package it's sold in is somewhat expensive. A single-use package option would be nice.
Other posts in this series:
- Review: Amazing Mold Putty
- How to Make Your Own Molds with Amazing Mold Putty
- Video: How to Make Button Molds & Buttons
- Video: How to Make Your Own Texture Molds
- Mold Putty Wrap-Up
Start molding today with the Mold Putty Project Pack.
