How to Make a Rubber Stamped Coaster
 In my previous post, I talked about some of the basic techniques for stamping on polymer clay. Today we're going one step beyond the basics and talking about "masking." Masking is a technique frequently used in rubber stamping, where you cut out a stamped image and use it to block (or "mask") the finish you're applying to the surrounding area. (Here's a nice masking tutorial if you're not familiar with the idea.) For today's project, we'll use a bird mask and chalks to create a coaster from polymer clay.
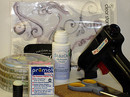
Materials
- 1/2 - 3/4 block white polymer clay per coaster
- Pasta machine
- Clay blade
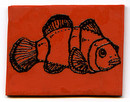
- Deeply-cut rubber stamps (I used Flourishes by Rhonna Farrer and a bird stamp from My Heart Stamps for You)
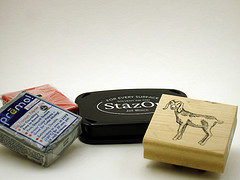
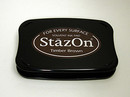
- StazOn ink pad
- Card stock
- Sharp scissors or craft knife
- Chalks and applicator
- Stamp cleaner and paper towels
- Cork coasters (pre-cut round or square cork coasters are available at craft supply stores, or you can buy the rolls of cork and cut them down to size)
- Super glue, Sobo, or a hot glue gun
Instructions
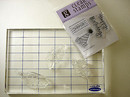
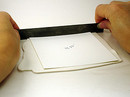 Condition clay and roll out a sheet on your pasta machine large enough to cut out a 4.25" circle or square. Try the 2nd- or 3rd-thickest setting on your pasta machine. Don't roll it too thin, since deeply stamped grooves are good. Use these templates to cut your square or circle.
-
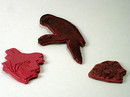
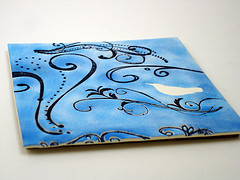
 To mask the bird, stamp bird image on card stock (using any type ink). Very carefully cut out around lines. Press bird (stamped side up) into desired location on clay.
 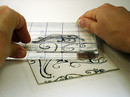 Apply StazOn ink to your rubber stamp and press it firmly into the clay. You may want to avoid stamping directly over the masked bird, as this could create unattractive creases in the clay there. Clean stamp. If any of your coaster's edges got distorted during stamping, use your template to straighten them up.
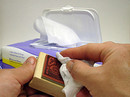
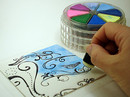 Use a sponge dauber or other applicator to daub chalk all over the coaster. I primarily used an up and down motion as I was applying the chalks. Rubbing it on in strokes gives a slightly different look — try both and see what you like. Be a little careful as you apply chalk in the area of the bird mask. As long as it's pressed into the clay (and you don't displace it), it should prevent chalk from coloring the clay in that area. Make sure to get close to the edges, though, so the bird will have a clear outline.
-
 Bake according to clay manufacturer's instructions. Remove the bird mask. Let cool.
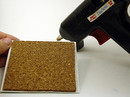
Spread glue onto cork. Press firmly onto clay. Leave under a heavy book for a couple of hours to set.
Inspirations & Variations
There's a huge online rubber stamping community, many of whom very generously share their techniques. Try subscribing to a few blogs whose stamping style you like. You might see a technique you can convert to use with polymer clay.You might also try finding polymer clay techniques you can enhance with rubber stamping. For example, these coasters were based off of faux finish tutorials on Polymer Clay Web:
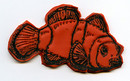
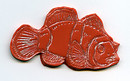
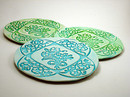 Coasters based on Faux Ceramic Tutorial
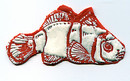
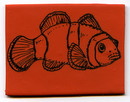
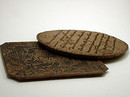 Coasters based on Faux Leather Tutorial
Keep your eyes open, and you're liable to find all sorts of wonderful ideas for rubber stamping on polymer clay.
Posts in This Series:- Rubber Stamping Basics for Polymer Clay
- Rubber Stamp Techniques for Polymer Clay
- How to Make a Rubber Stamped Coaster
- Video: How to Heat Emboss on Polymer Clay
- How to Make an Ultrasound Frame