Main

July 9, 2010

Cane-Covered Polymer Clay Pens by Crafty Goat

If you've ever gone down the deodorant aisle searching for the same one you bought last time, you've experienced it: manufacturers' incessant focus on new and better. It seems like a product's packaging hardly ever looks the same from one purchase to the next.

Pen manufacturers are no different, so the pens that were "proven" oven-safe a few years ago — like my previous favorite Papermate Flexgrip Ultra — may no longer be available. And while new and better options may be out there, who has the time and money to test every new brand of pen to see if it's oven-safe?

Luckily, Surfingcat did the hard work for us in her post about melting pens. She tried eleven pens in the oven and came up with a list of six that survived at polymer clay temperatures.

I decided to expand on her post a bit, to give a little more info about four of those pens that are readily available here in the U.S.:

  • PaperMate Comfortmate ball point pen
  • Bic Round Stic ball pen
  • PaperMate FlexGrip Elite
  • Bic SoftFeel Retractable ball pen

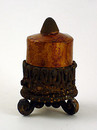
I made a polymer clay pen with each of these brands to get a feel for how easy they are to take apart and put back together. (Read the basics on covering pens here.) I'm including "finished" shots so you can get a feel for the aesthetic of each completed pen. My samples use cane slices since I'm practicing getting comfortable with canes (as you can tell, I have a long way to go!). But of course, you're not limited to canes. In fact, the options are pretty much endless. (For some extreme examples, take a look at Linda Peterson's PolyPens book about making pen sets.) For each pen, I've also included photos of the packaging (so you know what to look for on the shelves... well, at least until they change that packaging!), the un-covered pen, and the pen after it's been taken apart. (Click any photo for a larger version.)

The Pens

Continue reading "Covering Pens with Polymer Clay: New Oven-Safe Pens" »

December 4, 2008

Polymer Clay Inro with Alcohol Inks & RustShiny metallic and glasslike finishes all have their place. But sometimes you want an older, more weathered look. I recently experimented with using the Rust Antiquing Set by Sophisticated Finishes on polymer clay, and I wanted to share my experiences.

About the Rust Antiquing Set

Bottles from Rust Antiquing SetThe Rust Antiquing Set doesn't just create the illusion of a rusted finish — it actually creates a metallic, rusted top layer on whatever surface you paint it on. The set comes with two bottles. The Iron Metallic Surfacer paint includes real metallic bits. You paint this on first to create a rust-able surface. Then you use the Rust Antiquing Solution to rust those metallic bits.

How To Use It

Continue reading "Creating a Rust Effect on Polymer Clay" »

November 14, 2008

Studio by Sculpey Super Slicer BladesI was pleasantly surprised the other day when I found out my local Hobby Lobby has started carrying Studio by Sculpey products. Since I no longer have to order online and pay shipping, it seemed like a good time to give their Super Slicer blades a try. I've only ever had the one rigid clay blade, and it's gotten pretty dull with years of use, so I wanted to replace it. Plus, since I've never had a flexible, wavy or ripple blade before, I was looking forward to trying those out.

Continue reading "Studio by Sculpey Super Slicer Blade Review" »

August 27, 2008

Baking Surface OptionsA few weeks back, I talked about how to avoid burning polymer clay. Several of you shared great comments with your own tips. And as part of that, folks made several suggestions for baking surfaces. I thought I'd do a separate post here talking about some of my favorite baking surfaces, as well as highlighting some of your suggestions.

My Favorite Baking Surface

My baking surface of choice is a toaster-oven sized pizza stone I found at a garage sale a few years back. (Here's a similar one available online for $17.) There are a couple of features I really like about it:

Continue reading "Favorite Baking Surfaces for Polymer Clay" »

July 18, 2008

Rubber Stamping and Polymer ClayRubber stamps are handy tools to use with polymer clay. They're easy to find in a wide variety of styles and designs. And there are all sorts of ways to use them with clay, whether you're wanting texture, surface decoration, or some other effect.

Still, all the different types of stamps and inks can be a little overwhelming for folks who are new to stamping. And even if you're an old pro at using rubber stamps with paper, there are a few things you have to keep in mind when you're using them with polymer clay. So I'm starting a series of posts on using rubber stamps with polymer clay. Today we'll talk about the basics, including which inks and stamps to use, tips on release agents, and suggestions for cleaning your stamps.

Inks, Inks Everywhere... But Which Kinds Can I Use?

All inks are not created equal. You need to pay attention to more than just the pretty colors when you pick up an ink pad at your craft store. Here's a run-down of the different types of inks:

Continue reading "Rubber Stamping Basics for Polymer Clay" »

May 27, 2008

Makin's Ultimate Clay ExtruderAfter last week's Polymer Clay Pincushion post, I got a friendly email from Susanna. She asked,

"I just wanted to know if you had any advice on extruding clay using a clay extruder. I have so much trouble pushing the clay out and then cleaning it afterwards! Do you have any tips on how to make it easier?"

Ugh. I knew almost without asking that Susanna was using the old silver plunger-style extruder. I knew that because I lived with my plunger-style extruder for years, and so I recognized her frustration.

Continue reading "Review: Makin's Ultimate Clay Extruder" »

March 1, 2008

Custom Polymer Clay Word StampsPolymer Clay Central just posted a great tutorial by Kathy Canuel on making custom word stamps with polymer clay. If you've ever wanted to customize a gift by stamping the recipient's name, or add your own custom mark to a finished piece, or just save money on word stamps for polymer clay, her tutorial's definitely worth checking out.

To start, Kathy has you carve your word, mirror-image, into the clay, then follow that outline with extruded polymer clay. If you're like me & not crazy about your own handwriting (or if you have trouble writing in mirror image!), you could start with an image transfer instead.

Image Transfer & Extruded ClayBe sure to print your word/image normally (not mirror image like you'd do for most image transfers), since you want the stamp to be reversed. The transfer doesn't need to be perfect since you're just using it for a guide. Following the same method I used in my extruded clay texture mold video, I baked the clay sheet before continuing (to make it a little easier to work with), then added a layer of liquid clay. The honey-like consistency of the liquid clay catches the extruded clay pieces and keeps them in place, making it easy to follow the image transfer lines with extruded clay. Once you're happy with the word (check it with a mirror if you're having trouble visualizing it), follow Kathy's instructions to add a cute custom handle & bake it.

Looking for more ways to get your message across in polymer clay? Here are a few things to try:
  • Steel Stamping SetUse Stamps. If you have a set of alphabet rubber stamps, you can use them with polymer clay to spell out anything you like. You can also buy hardware stamping sets (like this one) for a pretty good price. Note: If you've got a Harbor Freight Tools nearby, take a print-out of the website's special price into the store with you. They'll honor the price, and you won't have to pay for shipping. (Thanks for the tip, April!)
  • Use a Label-Maker.
  • Alphabet Pasta, by dumbeast (Creative Commons)Use Pasta. Uncooked alphabet pasta is a good size for lots of projects -- and there's the added benefit of being able to bake it right in the clay, then pop it out after baking. Let me warn ya, though, that it's extremely time-consuming fishing out the right letters to spell a word. Especially if you're obsessive-compulsive and decide that the best solution is to separate each letter into its own little plastic baggie. Just guessing here, mind you... no personal experience at all! ;-)
  • Use Liquid Polymer Clay. Jeanne of ART for the HEART uses liquid clay and extruded clay pieces to create her own rubber stamps. The nice thing about these is you can run them through the pasta machine with your clay to get a great impression.

February 22, 2008

I was a primarily a paper crafter before I fell in love with polymer clay -- and I still enjoy stamping and making handmade cards. As expensive as craft supplies can be, it's wonderful when you can re-use tools for a different medium. So while these tools may be less "unconventional" than an herb mincer or a pumice stone, I wanted to share them with others of you who have a paper crafting background.

Here are five common scrapbooking supplies that you can also use with polymer clay:

Continue reading "Five Scrapbooking Supplies to Use with Polymer Clay" »

January 27, 2008

Amazing Mold PuttyToday I'd like to talk about silicone mold putties in general, and Amazing Mold Putty in particular.

But first, a story...

Years ago, within months of using polymer clay for the first time, I took part in my first craft fair. It was a one-day show, part of a convention we were attending. I made some "pet rocks" out of polymer clay, added some googly eyes, & printed the name of the organization on an attached slip of paper. Viola! An inexpensive craft fair item.

Continue reading "Review: Amazing Mold Putty" »

January 11, 2008

Studio by Sculpey clayPolyform has announced that their new clay, Studio by Sculpey, is now available. Thanks to a wonderful giveaway by the gals over at Polymer Clay Productions, I got an early chance to try out a block of Peacock-colored Studio by Sculpey clay, and I have to say I'm impressed.

To give you an idea of what I'm basing my comparisons on, here's my clay preference history in a nutshell. I've used Polyform products for most of my claying life, starting with Sculpey III in the early days, then switching to Premo as I learned about the difference in strength. In the past year or so, my "preferred clay" has been a Premo/UltraLight blend (approx. 2:1) because I like UltraLight's texture but find it hard to use by itself.

Here are my thoughts on using the new Studio by Sculpey clay:

Continue reading "Studio by Sculpey Clay Review" »

January 22, 2007

Rubbing alcoholRemoving pasta machine streaks isn't the only thing rubbing alcohol is good for. Here are a few other handy ways to use isopropyl alcohol with polymer clay:

  • Use rubbing alcohol to clean your work surface and clay tools -- including pasta machines, clay molds, and paint brushes (after using liquid clay).
  • Spread rubbing alcohol over the back of your paper for a better image transfer.
  • Smooth alcohol lightly over clay before baking to help get rid of fingerprints.
  • Use baby wipes soaked in rubbing alcohol to clean clay residue (especially that pesky red!) off hands.
  • When making mosaics from baked tiles, use a Q-tip and rubbing alcohol to scrub liquid clay "grout" off the tiles before baking again.
  • Clean any greasy residue off baked clay before applying a glaze finish.

Sounds like rubbing alcohol has earned its spot on the craft room shelf... Can you think of other ways you've used rubbing alcohol with polymer clay?

About this Site

CraftyGoat's Notes is all about sharing polymer clay tips & tricks that have worked for me. (And even a few that haven't!)

Read more about CraftyGoat's Notes...

Buy My Book

Archives

Enter your address to get CraftyGoat's Notes by email:

Delivered by FeedBurner