
How To Make Polymer Clay Pens Using Pen Kits
We've "covered" the basics of pen-covering... now let's take it to the next level.
 and Amazing Twist Pen") Pen making kits are more expensive and involve a little more work than your more basic pens, but the nicer results may make it worthwhile. Traditionally used in wood-turning, these kits basically consist of hollow tubes that you cover then assemble. There are several places online to buy these, with a wide variety of pen types available. While you can buy a pen assembly press for around $40 to assemble these, you can usually hammer them together with a rubber mallet and a little patience. (Upper-body strength doesn't hurt either!)
Pen making kits are more expensive and involve a little more work than your more basic pens, but the nicer results may make it worthwhile. Traditionally used in wood-turning, these kits basically consist of hollow tubes that you cover then assemble. There are several places online to buy these, with a wide variety of pen types available. While you can buy a pen assembly press for around $40 to assemble these, you can usually hammer them together with a rubber mallet and a little patience. (Upper-body strength doesn't hurt either!)
Of course, if you're interested in that slightly nicer, cross pen-style look -- but not interested in all the work -- you might like the Amazing Twist Pen. These are still harder to assemble than a Papermate -- but they're much easier than pounding with a rubber mallet. And while there's just the one style, they do look really classy.
So here's how to do it: Buy the pen. As far as I know, there's no major craft stores that carry these pens, so it may require an internet order. The pens will come individually wrapped in little plastic baggies -- and if you're anything like me, you may be a tad intimidated the first time you see one. At this point, they really don't look much like pens at all. Don't worry, though. The other thing they should come with is assembly instructions -- and as long as you have those (and this tutorial!), you'll be fine! <g>
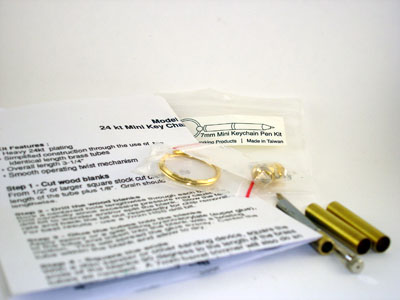
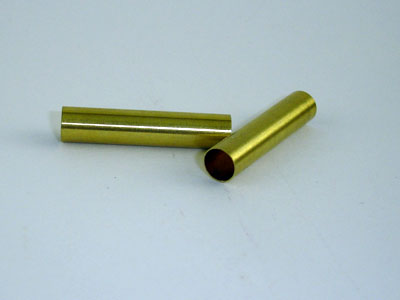
 There should be two hollow barrels for you to cover. Depending on the brand, they may be exactly the same length, or one may be slightly longer than the other. If it's important for your design that the "top" barrel be on top, be sure to check the instructions & verify the lengths first.
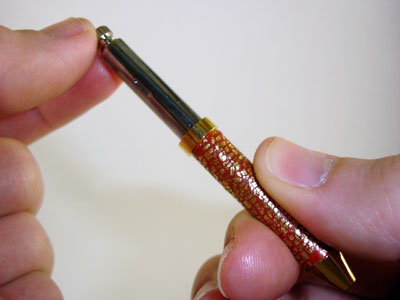
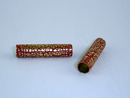 Cover each barrel with clay. This part is similar to what we did in the Basic Instructions. One difference is that the thickness of the clay sheet is more important here -- I think the pen kits look better if the covered barrels are the same thickness as (or a little thinner than) the pen findings. I used the fourth thickest setting on my Atlas pasta machine for the Amazing Twist Pen, and the fifth thickest setting for the Mini Keychain Pen. You'll have to eyeball it & see what works for you.
- Bake & cool.
- Be sure to do all your sanding, glazing, or other finishing before assembly.

 and Amazing Twist Pen") So far, so good. But assembling these things is the tricky part. I'm going to go through the assembly steps for two pen types: the Mini Key Chain Kit from Penn State Industries, and the Amazing Twist Pen from Boston Clay Works. You can refer to the parts diagram for terms used in the assembly instructions (note that I've used the terms barrel & tube interchangeably).
So far, so good. But assembling these things is the tricky part. I'm going to go through the assembly steps for two pen types: the Mini Key Chain Kit from Penn State Industries, and the Amazing Twist Pen from Boston Clay Works. You can refer to the parts diagram for terms used in the assembly instructions (note that I've used the terms barrel & tube interchangeably).
Mini Key Chain Kit
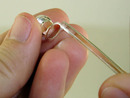
 Press the pen tip into one end of one of your hollow tubes. You may need your rubber mallet for this.
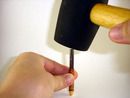 Use your rubber mallet to tap the pen mechanism, brass end first, into the other end of the same tube. While the instructions say to go to the indention in the silver section, I've found it's best to go just past that.
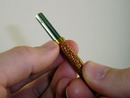 Slide the decorative pen ring over the pen mechanism til it touches the front tube.
 Press the cap into the other tube. Thread the key ring through the hole in the end of the cap.
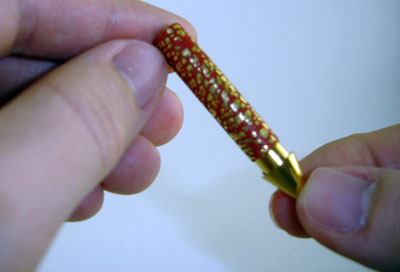
 Screw the pen refill into the front tube.
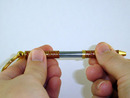 Push the two halves of the pen together.
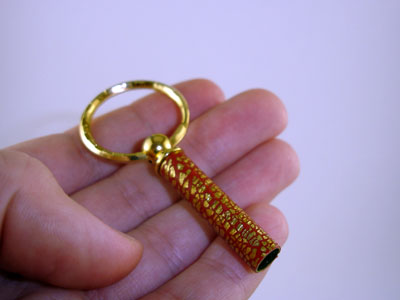


Amazing Twist Pen
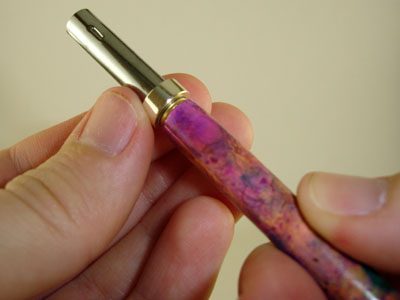
 The first step is to slide the pen clip onto the top cap piece.
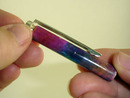 Now twist the pen clip & cap piece into the threaded end of the top tube. You can tell which tube is the top tube one of two ways -- the top tube is longer than the other tube, and it's also the tube that only has one threaded end.
 Screw the pen tip into one end of the the bottom tube.
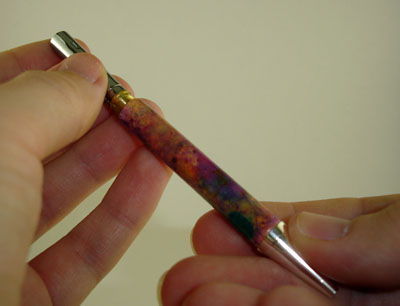
  Screw the twist mechanism into the other end of the bottom tube.
 Slide the decorative band onto the twist mechanism.
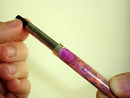 Screw the pen refill into the top of the twist mechanism.
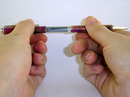 Push the two halves of the pen together.


While specific instructions will vary by brand and style, these instructions should give you the general concept. Pen kits really aren't that complicated, and they can become beautiful pens -- so I hope this tutorial will help you feel a little more confident the next time you see a baggie full of pen parts!
