3 Ways to Create Faux Polymer Clay Rocks
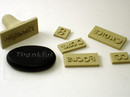
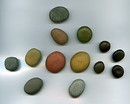 One of my favorite things about polymer clay is its ability to "be" just about anything else. I especially like the way it can mimic natural materials -- such as these stones. Today I'm going to show you three different materials you can mix into polymer clay to make "faux" rocks -- which you can then use for jewelry, for desktop rock-gardens, or for stamping with your own custom message.
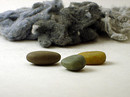 Dryer Lint: Granitex clay uses fibers to achieve its stone-like appearance. So if you like Granitex -- but don't like having to buy it in multi-color sample packs -- try re-creating it using your own fibers. Dryer lint is cheap & easy to find, and it creates polymer clay stones that have kind of a dreamy, mottled effect. Just pinch off a piece of dryer lint, and put it in the middle of a piece of clay. If you notice any obvious cat/dog/etc. hairs, pick those out. Then fold the clay around the lint until it's incorporated. Depending on how much lint you use, the effect can be pretty subtle. I like adding alcohol inks to make the variations a little more pronounced.
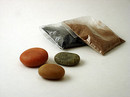 Play Sand: Multi-packs of colored sand are pretty inexpensive and have multiple uses with polymer clay. Use the same folding technique to incorporate the sand into your clay, adding more until you like the resulting color. Use one sand color for a subtle effect, or try mixing two or three for more variation.
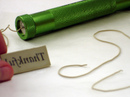
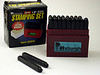
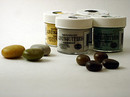 Embossing Powders: Embossing powders are available in the rubber stamping aisle and come in a huge variety of colors (and even some beautiful color mixtures). They're a little more expensive than the colored sand, but they're a good choice if you want a more pronounced effect. Just add the embossing powders into the middle of your clay, folding to mix, until you like the color. You can mix different colors of embossing powders to get more variation. You can also try hitting the clay with a heat gun after baking -- this causes some of the colors to "pop" and can be an interesting effect.
For all of these, I had the best results using translucent clay, which I dunked in ice water immediately after baking to increase the clarity. The translucence allows the inclusions inside the rock to show (not just those on the surface) -- which gives it more interest and depth.
Here's a few sites to check out for more polymer clay rock & inclusion fun:- Interested in trying other types of mix-ins? Marie Segal documented her experiments on Clay Factory with 7 pages of mix-in sample pics. Also check out this inclusions tutorial by Kris Richards.
- Glass Attic lists lots of faux stone and inclusion ideas.
- Recipes abound for custom embossing powder mixes. Check out these recipes from Cloud 9 and these recipes (with pics) from Rubber Stamps Club.