" /> CraftyGoat's Notes: April 2008 Archives

« March 2008 | Main | May 2008 »

April 30, 2008

Glitter

Miss me? Seems like I've been working day & night lately -- preparing for, executing & recovering from this past weekend's garage sale. All that stuff from my craft room clean-up had to go somewhere!

As I was sorting through & pricing items, I noticed some of the bottles of glitter I'd finally decided to get rid of. I've never been a big fan of glitter. Hubby & I specifically avoid buying glittery cards for each other. And if well-intentioned family members send such cards our way, we handle them by the corners, carefully, hoping to avoid any glitter "contamination." I have no idea, then, why I had several bottles of glittery stuff in my craft supplies.

One of the worst things about glitter, in my book, is that it sneaks into unbaked clay. Even in my mostly glitter-free house, I still manage to find specks now & then. And for some reason, they're completely invisible til after baking -- when suddenly that one little speck of glitter is all you can see! So I was a little surprised to find out at a recent polymer clay guild meeting that many of my fellow guild members are pro-glitter.

Apparently this whole glitter thing has become a big issue in the crafting world -- all in good fun, of course. Ellen DeGeneres wants to ban it. Crafters have staged pro-glitter rallies. It's election year, after all. We gotta debate the issues.

Do you love glitter or hate it?

Leave a comment letting me know how you feel. I'll randomly select two winners (one pro- & one anti-) to receive the items listed below (note: all supplies have been opened, but are almost completely full). One comment per person, please. Deadline is 11:59 p.m. CT on Saturday, May 3.

  • Glittery PrizePro-glitter prize:
    • Scribbles Glittering Golden Copper Fabric Writer
    • Stamp-n Stuff Copper Embossing Tinsel
    • Gold Ultra Fine Jewel Glitter
    • Ancient Gold Embossing Powder in Gilded Gold & Enchanted Gold.
  • Non-Glittery PrizeAnti-glitter prize:
    • Embossing Powder in Liquid Platinum, California Stucco, Cement & Gold
    • Pearl Ex Super Copper pigment
      (This is assuming the anti-glitter winner is okay with embossing powders, Pearl Ex powders, & other powdery shiny things that are not glitter. If not, I'll find something else from my craft stash to offer.)

Check back after the deadline for the results of this little informal poll, plus the names of the winners. Good luck!

April 22, 2008

Box of Clay
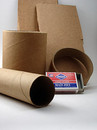
I've already shared some ideas for things you can re-use and recycle with polymer clay — things like tin can lids and cardboard. But today I'd like to talk about "recycling" the clay itself.

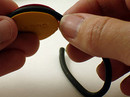
One of the nice things about clay is its built-in reusability. Nothing's permanent til it's baked. So if you decide halfway through your project that there's no hope, you can just wad up your clay up and start again. (Or if you're like me, carefully pick apart the separate colors first. Course, I was also the kid who didn't let different foods touch each other on my dinner plate. Maybe this is the grown-up version of that?) Not every medium is forgiving enough to let you start over mid-way without any waste... Aren't we lucky?

Here's a few more ways you can reuse & recycle your polymer clay:

  • Recondition Old Clay
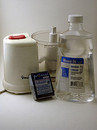
Don't throw away old packages of clay. If you have clay that's several years old, it may seem too hard & crumbly to use. But unless the clay is partially cured from being stored in a too-warm place, it's pretty easy to re-condition. Just add a drop or two of mineral oil or baby oil to the clay. If you have a clay-dedicated food processor, mixing the clay in it will make your job easier. But mixing by hand works just fine.
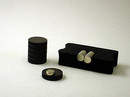
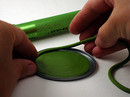
  • Use that scrap clay. Scrap clay is the uncured stuff you have left over from your previous projects. Some of it's perfectly usable as is. But sometimes you mix your cane ends together & end up with an ugly color, or you drop your clay on the floor too many times & it ends up covered with dirt and cat fur. This less-usable stuff is still good for plenty of things — whether it's serving as the middle of a bead (hidden by a decorative top layer) or being used to clean your pasta machine. Check out Polymer Clay Web's Uses for Scrap Clay for more scrap clay ideas.
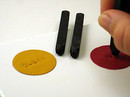
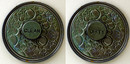
  • When in doubt, don't throw it out! Even the baked stuff — the stuff that got air bubbles, or broke, or just didn't turn out like you'd hoped — can be creatively repurposed.
    • Shoebox of Polymer Clay Pieces
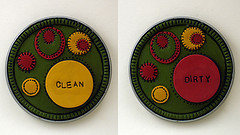
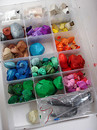
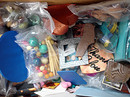
Use that unfinished bucket as a source of creative challenges. Try randomly pulling things out & finding ways to use them creatively in a completely different way. Have a couple of extra beads left over from a jewelry project? Try making a Bottle of Hope that features them as embellishments — or maybe as a lid. Making Artist Trading Cards is another low-stress way to use something you liked well enough to save. It can be really fun & uplifting to take a messed-up project and turn it into something creative and new.
    • Broken Pieces, Before & After
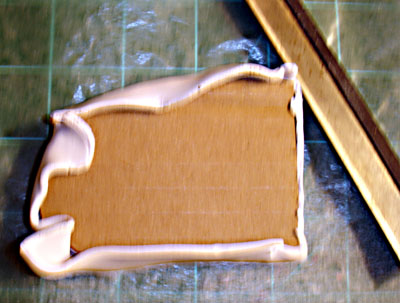
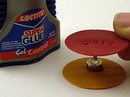
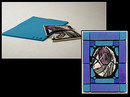
Broken pieces are great to use as mosaic tiles. Cut or break them down even more, then apply them to a strong clay base. This works for even weak & brittle brands of baked clay, since the mosaic's base provides the piece's strength.

Looking for more recycling tips? Check out these ideas from other polymer clay artists:

I hope you have fun finding ways to reuse and recycle polymer clay. Happy Earth Day!

April 21, 2008

Cardboard AssortmentIf you do much of your shopping online, you've probably built up quite a collection of cardboard shipping boxes. And, at least around here, cardboard boxes aren't part of the city's recycling program. So what to do with all that cardboard? Cover it with polymer clay, of course!

What Cardboard Is Good For

  • Adding lightweight bulk
  • Serving as an armature for shapes and structures not "natural" for polymer clay (like tall, hollow tubes)
  • Allowing you to use less clay for larger items

Cardboard Items to Cover with Clay

  • Shipping boxes: Use a sharp knife to cut down your shipping boxes into any size and shape you like. Use a template to cut and stack multiple layers if you want extra depth. This allows you to create a large form that's lightweight but has extra bulk.
  • Soap Boxes: Soap boxes are plentiful and are a perfect size for covering. Check out HGTV's site for Michelle Ross's covered soap box project.
  • Matchboxes: Matchboxes are a wonderful armature for sliding drawer pendants. Fair warning, though. Get really into making these & you're liable to have baggies full of matches & no place to strike them. I get the impression this bothers some family members. :-)
  • Cardboard TubeCardboard Tubes: I already mentioned making a polymer clay top hat from a toilet paper roll. But cardboard tubes' different sizes and strengths make them useful for a variety of things:
    • Try toilet paper or paper towel rolls for making napkin rings.
    • Sturdy rolls that are large enough to fit over your hand make a great base for a bracelet.
    • Tall, heavy cardboard tubes are great to decorate as pen holders. For a nice example, check out Sue Gentry's pen holder.

How to Cover Cardboard with Polymer Clay

  • You don't have to coat the cardboard with anything (you could cover it as is), but it may be hard to do as the clay doesn't grip the cardboard's texture very well.
  • I had the best results coating the cardboard with Sobo Glue or acrylic paint, then letting that dry before covering with clay. Spreading TLS on the cardboard before covering also works.
  • Thicker sheets of clay (i.e., the 2nd-3rd thickest setting on the pasta machine) are easier to work with, especially if you're wrapping the clay around sharp cardboard edges.
  • Another option is to do a couple of layers of clay to cover the cardboard base. Use a thicker base coat of clay to smooth things out. After that's baked, add a decorative layer.

Removing the Cardboard

In many cases, it works well to leave the cardboard in place after baking so it can continue to add support to your structure. But if you just want to use the cardboard as a temporary armature to remove after baking, here are a couple of tips:
  • Use foil or wax paper instead of glue for easier removal.
  • After baking, leave your polymer clay piece soaking overnight to moisten the cardboard and make it easier to remove. If the clay and cardboard are still stuck together in the morning, try running a needle tool along the edge. But be careful not to force the cardboard. You're likely to hurt the clay too.

I hope you enjoy upcycling your cardboard into something creative. As always, I'd love to hear your ideas!

April 18, 2008

Finished MagnetFinally, a crafty answer to that age-old question: Are the dishes in the dishwasher clean or dirty? This project takes a recycled can lid and turns it into a dishwasher magnet with a reversible Clean/Dirty indicator.

Supplies

  • Can LidsCan Lid: The juice lids from the frozen concentrate stuff work great since they already have nice smooth edges. Otherwise, I'd recommend buying the Handy Can Opener for about $8 at CVS (also available online). The nice thing about this brand is it removes the entire top of the can, leaving no jagged edges. Use it to open all your cans & soon you'll have stacks of lids to play with. I toss my lids in my dishwasher's silverware basket to clean them before I use them.
  • Polymer Clay: I recommend a stronger clay, such as Premo, so nothing breaks if it happens to fall on the floor.
  • Supplies: MagnetsMagnets: You'll need two magnets. The first should be the little-bitty super-strong type (for inside the reversible indicator). The second should be a standard strength magnet (for the back of the lid).
  • Liquid Clay
  • Tools: Pasta machine or brayer, clay extruder, cookie cutters, clay knife, letter stamps
  • Super glue: I like Loctite Control Gel

Instructions

  1. Step 1: Prepare Clay

    Prepare clay. Condition your clay, then use your pasta machine or brayer to roll out very thin sheets. You'll want a background sheet as big as the lid and two smaller sheets for the reversible magnet. These three pieces need to be almost paper-thin -- I used the second-thinnest setting on my pasta machine. If your layers are too thick, your magnet won't be able to connect through the clay to the can lid.

    You can also go ahead and roll out any other embellishments you want -- these can be any thickness you like.

  2. Step 2: Cover Lid with Clay

    Add background clay to lid. First, give the lid a thin coating of liquid clay to help the polymer clay stick as you work. If you have round cookie cutters in the appropriate sizes, use these to cut out your clay pieces. (If you don't have a cookie cutter, you can make a template with card stock or just eyeball it.) When applying the background piece, roll it down gradually to avoid trapping air bubbles. If you do notice any air bubbles, use a needle to "pop" them before you bake. For this project, air bubbles don't just look bad -- they can also prevent the magnet from getting good contact with the lid.

    If you have a clay extruder, you can roll a snake to go around the inner edge of the can lid. This hides any uneven edges on the clay sheet and also frames the piece nicely.

  3. Step 3: Make Magnet Pieces

    Make & bake magnet pieces. Use a smaller cookie cutter or template to cut out two clay pieces of the same size. These will be the two sides of your reversible magnet. I used different colors for mine, but you can do whatever you like. Place these on your baking surface, since they'll be tricky to move after stamping. Use letter stamps (or any of these other lettering methods) to spell out the words "Clean" and "Dirty." I had the best results when I started with the middle letter and worked out from there -- it was much easier to center it that way. Leaving them separate, bake these two pieces. We want to make sure they stay nice and flat & don't get distorted when we assemble the magnet.

  4. Step 4: Embellish Lid

    Embellish your lid. While those pieces are baking, decorate the rest of the lid. Try texturing, attaching 3-D clay pieces, or anything else you like. Just be sure to leave a spot big enough for your magnet.

  5. Step 5: Assemble Magnet

    Assemble magnet & bake. Once your clean/dirty clay pieces have baked and cooled, use super glue to sandwich a super-strong magnet in the middle. Double-check that the words are going the same direction on both sides, and that the circle's edges are lined up before you do the gluing.

    Step 5b: Create Edge for MagnetAfter the glue is set, make a thin clay snake to wrap around the magnet's edges. Don't create a raised edge, though, or it could keep the magnet from making contact.

    Bake the magnet and can lid according to the clay manufacturer's instructions.

  6. Step 6: Glue Magnet to Lid Back

    Finishing touches & final assembly. After everything has baked and cooled, you may wish to do antiquing, sanding, buffing, varnishing, etc. I antiqued my piece with black paint to highlight the lettering and texture. Once you're happy with the looks of the lid, add a regular-strength magnet to the back. Test before gluing: depending on your magnets' strength, you may need to avoid your "Clean/Dirty" magnet's spot to keep the two magnets from repelling each other.

    Attach your new magnet to the dishwasher & set the indicator appropriately. Your family members now have one less thing to wonder about!

Finished Silver MagnetThere are lots of options for using can lids with polymer clay. If you create something cool, let me know. I'd love to see what you come up with!

Of course, can lids aren't the only recycle-able you can cover with polymer clay. Check out this list of things to re-use and recycle with clay. And stick around for more Earth Day ideas!

Psst! Not a crafter? You can also buy these dishwasher magnets in my store.

April 14, 2008

Teddy BearMy local polymer clay guild met Saturday, and new member Nance Ross taught us. Not only did I learn how to make these cute little articulated teddy bears, but I also learned what that means! (Articulated means his little arms & legs are movable, in case the term is new to anyone else.)

After a fun day at the Oklahoma guild on Saturday, hubby & I decided to make a quick trip down the interstate on Sunday to visit the North Texas Polymer Clay Guild. (Well, technically, I visited the guild; he hung out at places offering free wi-fi.) I'd been meaning to visit for a while now. After all, when I helped found our local guild 1 1/2 years ago, I had no idea what was supposed to happen at a guild meeting. I figured it's high time I learned! Plus I'd heard Laura Griffin was teaching this meeting, and I've always admired her style, both in polymer clay and in rubber stamping/paper crafts.

Faux Ceramic BeadsLaura's lesson was great & I learned some handy tricks for creating a faux ceramic look with 3-D molded beads. But what I enjoyed most was that I felt very much at home with this group of people I'd never met before. I didn't use to think I was a group-joining type, but it's so easy to connect with other creatives who "speak your language." If I didn't already have a local guild, I seriously think it'd be worth the 3.5 hour drive to go to theirs.

Do you have a local guild? (Don't know? Check here.) Are you involved in it?

  • If you have a local polymer clay guild, but have been nervous about checking it out, I'd really encourage you to. (And if you're in central Oklahoma, consider this a personal invitation!) Most guilds love sharing their polymer clay passion with everyone, regardless of skill level.
  • If your closest guild is a bit of a drive, I'd encourage you to try it out at least once. You might find the benefits of hanging out with other creative people are worth the driving time -- at least once in a while.
  • And if there's not a guild anywhere near you, I'd encourage you to look into starting one. It's not as hard as you might imagine! (This document has a lot of good info for getting started.) There's a fair chance that if you're looking for a guild, there are others nearby who would also be interested.

So a big thanks to the North Texas guild for letting me sit in on their meeting -- what a great group of folks! And a special thanks to my fellow Central Oklahoma guild members. I truly appreciate you.

April 11, 2008

With Earth Day just around the corner, this is a great time to consider how we can all be more conscientious about how we use resources. While it may not seem like an obvious Earth Day choice, good ol' plastic-based polymer clay can be part of some wonderful reuse & recycle projects. Here's 10 things you can save from the landfill & use with polymer clay:

  1. Light BulbLight Bulbs: Are you replacing your old light bulbs with energy-efficient compact fluorescents? Don't throw those old ones out! Cover them with polymer clay to make a lovely rounded base for any sculpture.
  2. Plastic Easter Eggs: Polymer clay-covered eggs are all the rage, but you don't necessarily have to cover a real egg. You'll want to test yours first, but some plastic Easter eggs are oven-safe. This means you can use your leftover eggs -- which seem to multiply faster than Easter bunnies this time of year -- for your polymer clay egg projects. Check out It's Jest 'er Clay for one creative "eggs-ample" of egg covering.
  3. Bottles to coverBottles & Jars: Glass bottles are wonderful for covering with polymer clay, whether you're making a Bottle of Hope or a votive holder. Try incorporating translucent clay into your design if you're doing candle holders, lampshades, nightlights, etc. The light shining through will give it a whole new dimension.
  4. Wooden Boxes: Thrift stores and yard sales often offer unwanted jewelry and trinket boxes. Snatch them up! Depending on the condition, you may have to do some sanding and/or repair work, and wood often needs to be baked before covering with clay to remove excess moisture. Afterwards, just cover it with clay to make your own unique treasure box.
  5. Cardboard TubeCardboard Tubes & Boxes: Paper towel & toilet paper rolls can be great when you need a rounded section in a sculpture. Other cardboard shapes work well too -- for example, matchboxes are are a popular base for small pendants that slide open.
  6. Mint Tins & Tin Cans Mint Tins & Tin Cans: Mint tins are simple to cover and great for carrying small items in a purse. Pet food & canned meat/fish also come in small, easy-to-cover cans.
  7. Can LidsCan Lids: Speaking of cans, can lids can be a cool base for magnets, holiday ornaments, and more. Look for a can opener (such as the Handy Can Opener) that takes off the entire top of the lid, leaving no jagged edges.
  8. Bottle CapsBottle Caps: Don't toss those bottle caps! Use them with polymer clay to make jewelry, magnets & more. If you don't drink anything that comes with bottle caps, you can probably find pre-smashed bottle caps on the side of the road. (You get bonus points for recycling and cleaning up the neighborhood!)
  9. Scrap Paper NotepadScrap Paper: Use polymer clay to turn your scrap paper into a sturdy polymer clay notepad.
  10. Recycled FrameFrames: Garage sales & thrift stores are full of frames that have seen their better days. Fix them up with a little polymer clay. They'll be better than new!

Stay tuned for more earth-friendly polymer clay ideas between now and the big day! In the meantime, I'd love to hear your suggestions for an Earth Day-worthy polymer clay project.

April 5, 2008

Just wanted to share links to a few things going on in the polymer clay community:

  • If you've checked out my Bottles of Hope tutorials & are ready to create some bottles of your own, you'll be interested in what the gals at Polymer Clay Productions are up to. They're starting a regular Bottles of Hope challenge, with a new theme each week (the first theme is "Spring"). It sounds like a fun way to practice creativity while building up lots of bottles to donate. Check out their post here. Right now they're looking for a name for it -- and they're giving away Make It Mine magazines for the top 3 suggestions.
  • I was pleased to read the National Polymer Clay Guild's take on the ownership debate. Specifically, I liked that:
    • They state up-front that they're not trying to police the community.
    • Their "Rules to Live By" seem thoughtful and considerate. To me, it's a welcome clarification of & expansion to their previous, more vague-seeming ethics statement.
  • I hated to see Jeanne Rhea's post about leaving polymer clay, as she's one of those people whose interesting directions appeal to & inspire me. Jeanne is selling off her polymer clay work on her Etsy site, so check that out. But also be sure to read her "moving on" post. It includes a wise quote from columnist Ellen Goodman that I think all of us need to be reminded of from time to time: that moving on (whether it's in art or life) doesn't negate the importance of your past experience. A beautiful message!

I hope you're having a wonderfully creative weekend!

April 3, 2008

This video runs just under 8 minutes, and talks about the following:

  • Bottles of Hope history
  • Suggestions for finding bottles to cover
  • Bottle preparation
  • Bottle covering
  • Ideas for making your own Bottles of Hope

Not a big fan of videos? You might be more interested in this Bottle of Hope tutorial.

My guild had an excellent speaker this past weekend, a breast cancer survivor who's helping us get more involved in the Bottles of Hope program. I put together this information for our meeting & wanted to share it with you too.

What Are Bottles of Hope?

Finished Bottles of HopeBottles of Hope are polymer clay-covered bottles that are given to cancer patients to share hope & cheer. The Bottles of Hope (BOH) program was started in 1999 by cancer survivor and polymer clay artist Diane Gregoire. She covered empty medicine bottles from her treatment and took them to other patients, telling them to write a wish and put it inside. The program grew, and now polymer clay artists worldwide create the bottles to give to cancer patients.

Preparing the Bottles for Covering

Bottles to coverYou can cover any kind of bottle, or even other "vessels" like PVC pipe. But if you're going the traditional route and covering a medicine bottle, here are a few tips to help you prepare it for use:

Removing the Lid & Stopper

The medicine bottles with a rubber stopper and metal top can be a little tricky to open. Give these methods a try:
  • Removing lid with pliersUse pliers to pry the lid off from the bottom edge. You may need to go around and pry a few spots for this to work.
  • The metal is fairly thin, so it cuts or tears fairly easily. Working from the hole in the center of the top, use needle-nose pliers or metal snips to make cuts in the metal, then pry it off. (Wear gloves if you're using this method -- the tools and the metal can be sharp.)

Cleaning & Preparing

  • Soaking: You can soak the bottles overnight in soapy water, then rinse them out. This may also help remove any paper labels.
  • Boiling bottlesBoiling: You can also boil the bottles (as long as you remove the lids first). This has the added advantage of eliminating any contamination concerns.
  • Removing labelsRemoving Labels: Paper-based labels are easier to remove after soaking. The plastic labels remove easily even before soaking. Just use fingernails or tweezers to lift an edge, after which the label should peel right off.

Covering Basics

Here are some basic covering instructions to get you started making your own Bottle of Hope.
  1. Coating with TLSCoat Bottle with TLS: Coat your bottle with a very thin layer of liquid clay. This step is optional, but I find that the honey-like consistency of the liquid clay helps catch the clay sheet and keep it in place as I'm working. Some folks coat their bottles with glue instead, letting it dry before they add the clay.
  2. Trimming clay sheetRoll out & Trim Clay Sheet: Use your pasta machine to roll out a polymer clay sheet big enough to cover the bottle. Lay the clay sheet on your work surface, and lay the bottle on top of it. Make straight cuts alongside the top, bottom, and one side of your clay sheet to align it with the bottle.
  3. Covering bottle with clay sheetCover Bottle: Roll your bottle and the clay til you've covered the bottle in clay. Roll back enough to cut along the line where the clay sheet touched. Smooth the seam. Use a knitting needle or other rounded tool to press in the neck area of the bottle.
  4. Cutting out lidMake a Lid: Make a flat disk for the top and bottom. Small round cookie cutters are wonderful for this, if you happen to have the right size. Otherwise, you can create a cardstock template the right size. You can use the original rubber stopper as part of your lid, or you can make your own stopper by pressing a polymer clay plug into the bottle's top. Cork stoppers are another attractive option. Keep in mind that you don't want to bake your bottle with an air-tight lid (such as the rubber stopper) in place. Trapping hot air inside the bottle during baking could be dangerous!

Of course, these steps are just a jumping off point. Part of the fun is making your bottle unique. Your sheet might be a Skinner blend or be covered with canes. You might add some sculpted items to your sheet-covered bottle. Or you might dispense with the sheet altogether. The Galleries section below has some wonderful design inspiration -- some designs leave much of the bottle bare, and some designs are elaborate sculptures whose base happens to be a bottle. Have fun as you experiment with the different options!

Extras

  • Tags: Some polymer clay artists create wonderful themed bottle and tag sets. For example, local cancer survivor Cindy received a beautiful dragon bottle from artist Susan deWit. Inside the bottle, a tiny heart dangles from a chain attached to the lid. The handwritten tag reads, "The cancer dragon has been slain -- the heart beats strong." Consider ways you can personalize your bottle to make it extra special to its recipient.
  • Motivational Quotes: You don't have to come up with your own sayings either. Find motivational & hope-themed sayings in a quotes book or online. Browsing these quotes may even spark some new bottle ideas!

Helpful Websites

General Info

  • Bottles of Hope: The official site for the Bottles of Hope program. Includes history, gallery, printable brochure & tags, and more.
  • Glass Attic: Bottles of Hope: Glass Attic's Bottles of Hope page covers a wide range of information and includes links to lots of other sites.
  • Dephi Forums: Bottles of Hope: The Delphi Bottles of Hope forum includes sections on resources, getting started, and more.
  • SCPCG Bottles Of Hope: The Southern Connecticut Polymer Clay Guild, where BOH originated, has a nice summary of the bottles' history.

Tutorials

Galleries

Other Resources

About this Site

CraftyGoat's Notes is all about sharing polymer clay tips & tricks that have worked for me. (And even a few that haven't!)

Read more about CraftyGoat's Notes...

Buy My Book

Archives

Enter your address to get CraftyGoat's Notes by email:

Delivered by FeedBurner