" /> CraftyGoat's Notes: April 2009 Archives

« March 2009 | Main | May 2009 »

April 30, 2009

Sculpting Mythical Creatures out of Polymer ClayIt's hard to believe it's been almost 10 years since I stumbled upon polymer clay. Hubby and I were on vacation, and I saw the Klutz books Incredible Clay Book and Create Anything With Clay in a toy store. I quickly realized polymer clay wasn't just for kids and fell in love with it. But when I went looking online for more information, I didn't find much. Polymer Clay Central was about it back then. So I spent hours working through various of their tutorials, trying to figure out what to do with this new and amazing material. And I clearly remember one of those tutorials was Dinko Tilov's How to Make a Bird with Teeth.

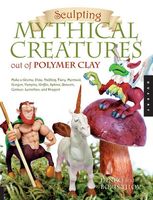
Dinko Tilov is still working with clay, and after a successful first book, he has teamed up with his brother Boris to write another. Their new book, Sculpting Mythical Creatures out of Polymer Clay (Quarry Books 2009), includes instructions for making 13 different creatures.
Overview

The book starts with a too-brief introduction to clay. I would have liked to have seen a discussion of which clay brands would be best for these projects. They mention tools to use — specifically the taper-point and cup-round clay shapers — but they don't include pictures of them. Granted, they say these specific tools aren't required... but it's hard to substitute something else if you don't know what they look like. (Here's a pic of the clay shapers on their website in case you're curious.) I also wish they had given more information, either in the intro or in the individual project instructions, on which wires to use for armatures, since the gauge and type of wire can make a lot of difference in its strength.

Following the intro, the book gives step-by-step instructions for making thirteen different polymer clay creatures, including:

  • Gnome
  • Pixie
  • Halfling
  • Fairy
  • Mermaid
  • Gorgon
  • Vampire
  • Griffin
  • The Sphinx
  • Unicorn
  • Centaur
  • Leviathan
  • Dragon

If you're into mythical creatures, you'll likely find several projects here that strike your fancy. While some of the projects just don't appeal to me (the fairy and mermaid don't seem especially dainty or pretty), I do like the halfling, griffin, unicorn, and dragon projects. Still, I felt like Dinko Tilov's first book, Creating Fantasy Polymer Clay Characters, had a more charming collection of characters. Both books use glow-in-the-dark eyes, which I'm not crazy about, but it's easy enough to substitute another method of making eyes.

The projects progress from easiest to hardest, building on techniques demonstrated in previous chapters. For example, the armatures get increasingly more complicated as you go through the book, ranging from the armature-less gnome in the first chapter to the multi-appendaged dragon in the final chapter.

Each project includes:

  • A time estimate for completion. (I really like this. Granted, the project I tried took me much longer than their estimate. But I am kinda slow!)
  • A poem introducing the creature. This is a cute idea, and makes me want to write poetry for all my characters.
  • Lots of excellent step-by-step photos and directions (seems like it has more photos than most books).
  • A "variations" page, showing more creatures that could be made by simply changing colors, tweaking expressions, etc.

The book has lots of special touches. There's a chart that shows how changing facial hair on the same head can make a variety of characters. I love stuff like that. I like the stories & poems about the characters and the humor used in the instructions. It's a fun read — maybe not as much fun as a Christi Friesen book — but a lot more fun than the dry textbook style some craft books have.

I like the fact that they used clay characters as illustrations throughout the book — for example, there's a clay character holding a scroll who introduces each chapter. The fun way they made their characters come to life tempted me to start on a kids' book with some of these characters in starring roles. (Maybe I'd even have it done by the time my little one learns to read!)

I think my biggest complaint about the book is that it's lacking in finishing details. It doesn't show much texturing or smoothing, things that can make the work look a lot more professional. Some of the finished project photos in the book even have fairly obvious fingerprints. So while the book does a really good job of showing how to make armatures to create structurally-sound sculptures, those sculptures don't look especially polished.

Summary

  • Title: Sculpting Mythical Creatures out of Polymer Clay (Quarry Books 2009), by Dinko and Boris Tilov
  • Price: $16 + shipping
  • Pros:
    • It's a fun read: each character has his own poem, and there's humor mixed in with the instructions.
    • Great step-by-step photos.
    • "Variations" page at the end of each chapter gives encouragement and guidance for tackling your own versions.
    • Good info on armature and sculpture-building basics.
  • Cons:
    • Doesn't cover much detail finishing work (texturing, smoothing, etc.), so the end results don't look especially polished.
    • Characters aren't as charming as those in Tilov's first book, Creating Fantasy Polymer Clay Characters.
  • Who It's Good For:
    • Anyone who wants to learn more about making armatures & structurally-sound sculptures.
    • Fans of Christi Friesen-style writing will probably enjoy the poems and humor in this book.
    • Older kids should be able to do these projects, especially if an adult helps with the armatures.

Read another review of this book (and possibly win a copy) here.

April 27, 2009

June 2009 Polymer CafeMaureen Carlson's "Story Boxes" article in the June 2009 Polymer Cafe has some very wise words about perfectionism in art:

"There's a strange truth that happens when one is creating art from the soul. If it has authentic energy then the power of the creative voice comes through even if the piece is not technically perfect. However, if there is no voice, then the piece succeeds or fails on its level of perfection."

The article tells how she builds on that concept to create her story boxes, and even includes a questionnaire to help find your own story, energy, and voice. One of my favorite PC articles in recent history!

Do you struggle with trying to reach an elusive level of perfection, getting caught, as Carlson puts it, "in that fearful, spinning cycle of redoing it again and yet again?" How do you overcome it?

April 24, 2009

Blocks of Polymer Clay (Premo, Fimo and Kato)Used to be, we could count on Michaels to put all their polymer clay on sale pretty regularly. Every few months, we'd all stock up on our favorite brands for just 99 cents a block. Unfortunately, the last few times they've only put Sculpey III on sale. If your stockpiles have gotten low while you've been waiting for the next sale on the "good stuff," here are a few options for finding good prices:

Local Stores

Depending on which other stores you have nearby, you may still be able to find a good deal locally. Hobby Lobby and Joann's still have 99 cent and percent off sales on all brands. Watch their websites or sign up for their email lists to get notified of sales.

If things get really desperate, you could always use the weekly 40% off coupons to buy one block at a time. It's not the quickest way to stock up, but if you're stubborn like me, it beats paying full price!

Online Stores

There are plenty of choices for buying clay online... only problem is that shipping can be expensive. Still, it can be a good option, especially if you prefer the larger blocks of clay, which aren't generally available in local stores.

Here are some prices from a few online stores:

StorePremo (sm / lg)Fimo (sm / lg)Kato (sm / lg)Notes
Boston Craftworks$1.75 / 11.75 2.00 / 7.50Shipping via USPS Priority mail: actual cost + $3.95 handling fee.
Polymer Clay Express$2.00 / 14.002.00 / 10.002.00 / 9.00Shipping via UPS and USPS: minimum charge of $4.95, plus additional amount based on weight.
The Clay Alley$2.00 / 12.00 - / 8.50Minimum Order is $10.00 before shipping. Shipping via Priority Mail: minimum charge of $4.60; flat rate shipping on most orders of either $6.75 or $13.00 depending on box.
Dick Blick$2.29 / 11.572.57 / 9.99 Shipping via FedEx. Costs $8.95 for orders up to $159.99.
Munro Crafts$2.75 / 20.503.15 / 15.752.39 / 10.19Minimum order of $25. Discounts on larger orders (25% off orders $50-100; 40% off over $100; 50% off over $200). Shipping via UPS or USPS Priority Mail. No shipping estimates available on site.
CreateForLess$2.99 / 14.993.29 / - Offers discount prices for buying in bulk (e.g., if you buy 5+ packages of Premo clay, you get a cheaper per package price) Shipping via FedEx or USPS, based on order total. (Starts at $4.95 for orders up to $14.99.)
Hobby Lobby$2.47 / -2.37 / -1.99 / 8.99Shipping via UPS Ground or USPS, based on order total. (Starts at $5.95 for orders up to $15.00.) Often advertises shipping specials.
Polymer Clay Superstore$2.29 / 12.99  Shipping via UPS or USPS, with estimates available at checkout.
Creative Wholesale$1.54 / 11.53  Shipping via UPS, based on order weight. (Shipping charges shown at checkout time.) Additional discounts may apply for case/multiple case orders (see wholesale pricing terms for details).
Note: Prices as of 1/2/2013. If a store had both sizes (2 oz and 3 oz) of Kato listed, I used the price for the newer 2 oz bars. Kato metallics and other "specialty" colors may cost extra. Polymer Clay Express, Munro Crafts and Creative Wholesale are the only stores carrying Premo's Cobalt Blue and Zinc Yellow.

Some of the minimum orders may be easier to reach if you can go in together with a clay buddy. If you've got a local clay guild, it's not that hard to reach the $200 order Munro requires for 50% off. And splitting shipping with a friend or two makes it cheaper for everybody.

Ebay may also be an option, with clay often listed for $1/block. Keep an eye out for clay lots, too. You could get a good deal if someone decides clay's not for them.

Bonus Tip: Whether you're stocking up on the sale price at a local store, or making a bulk order online, it's always useful to take inventory first. I like to keep a couple of blocks of the colors I use regularly — more for colors like black, white & silver. So I print off a sheet that lists all my regular colors, then go through my clay box to see which ones I'm low on. Helps when I get to the store — that way I don't end up buying even more Alizarin Crimson Hue when I've already got too many blocks at home.

Got another good place to buy cheap clay? Please leave a comment!

April 21, 2009

sundae by ginnerobotViolette Laporte's Inside Out blog just had a good tip for making mokume gane easier:

Instead of curving your blade to do the shaving of thin slivers, I like to curve the polymer clay sheet and use a straight blade. To give my clay sheet a gentle curve, I place it on a large jar (or an ice cream container).

Read the whole thing here: Tip # 31

Not only does Violette give us a way to make mokume gane and mica shift easier... but she encourages us to empty an ice cream container first in order to do so. Best tip ever!

For another neat mokume gane trick, check out Tonja Lenderman's Scrap Polymer Clay Mokume Gane Sheet tutorial (found via CraftGossip Polymer Clay). Instead of stacking multiple sheets of clay, she recommends chopping up scrap clay to make a single sheet. Fun clay recycling tip — and just in time for Earth Day!

April 19, 2009

I'm always trying to improve my blog, so I keep an eye on sites like ProBlogger. There are lots of good suggestions there. But it's like many other blogging tips sites in that much of what it says works best for technology or newsy blogs. Craft blogs have some special challenges that you don't see addressed very often.

A few months back, "Sister" Diane Gilleland of CraftyPod mentioned that she taught a class on craft blogging. I shot off an email asking if her class was available online... but alas, it was only a Portland thing. While that's an area of the country I'd love to visit sometime, it seemed like a bit too much of a commute just to take a class.

So I was very excited Friday when Sister Diane announced she had written an ebook on that very topic. "Making a Great Blog: A Guide for Creative People" is available on her site for $12.50, and it's specifically geared towards arts & craft bloggers. The 49-page ebook covers the why and how of starting a blog, tips for making it pretty, and a primer on blogging etiquette.

While the ebook is geared towards the beginner blogger, I did find it useful. I especially liked the section on photography, which included a few tips on props I'd never considered before. I like that she encouraged folks to first figure out why they want a blog and what their goals are. Having a goal in mind always helps focus a new project. I'm glad she talks about getting permission when using others' photos. And I liked her worksheets. I plan to go through some of the exercises just to make sure my blog is still moving me towards my goals.

I'm generally not crazy about ebooks, but this one was well-formatted and easy to read. It seemed a little expensive to me... but then again, it's much cheaper than buying a flight to Portland to attend her class in person! So I guess I can't complain much.

If you're just getting started (or just thinking about it) in blogging and need some guidance, I would highly recommend Sister Diane's ebook (buy it here). You may also want to keep an eye out for parts 2 and 3, "How to Promote Your Creative Blog" and "Creative Blogging 102," due out this summer.

If you've been blogging for a while and are already an expert, you might be more interested in ProBlogger's free 31 Days to Build a Better Blog program. The nice thing about ProBlogger's Darren Rowse is that he focuses on blogging as a way to bring value to the reader. Good content is most important, not search engine hacks or other tricks. I recently started the 31 Days to Build a Better Blog program, and I feel like it's helping me improve my blog.

Finally, if you don't need any help with your blog, you might be more interested in tips for better microblogging (aka Twitter). This list of 9 Twitter Tips for Artists has a few things I don't agree with (like retweeting everything you think is funny). But it makes up for that by its suggestion to limit your self-promotion (a common mistake for new artists on Twitter). Overall it's a good read if you're considering Twitter-ing.

April 16, 2009

Measuring same amounts of claySometimes, when you need two pieces of about the same amount of clay, you can eyeball it and get close enough. But sometimes you want to be a little more exact. For example:

  • Making same-sized parts: Earrings look best if they're both the same size (unless you're trying for that uneven look!). Same goes for strands of beads.
  • Color-mixing recipes: If you're mixing 3 parts yellow and 1 part orange to get the perfect color, it's nice to have a defined size for each "part."
  • Re-creating previous projects: For products I sell, I like to keep detailed instructions so I can re-create an item. Knowing measurements means it's much easier to make this pair of earrings the same size as the last pair the customer ordered.

Here's an easy way to accurately measure polymer clay:

  1. Roll out a sheet of clay to any thickness you like on your pasta machine. (If you're writing instructions for later, make a note of the thickness you chose.)
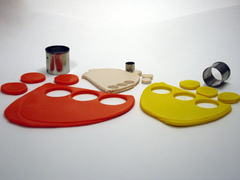
  2. Use a cookie cutter to cut out a circle of clay.
    • For color-mixing, each circle of clay is a "part" — so the cutter's size and shape don't really matter.
    • Otherwise, make a note of which size of cookie cutter you used. I use a Sharpie to number my cookie cutters, starting with 1 as the smallest, so I can just make a note of which number cutter I used.

Got your own favorite way to measure polymer clay? I'd love to hear it — just leave me a comment!

April 13, 2009

Polymer Clay and Mixed MediaChristi Friesen has built up quite a following. If you hang around polymer clayers for long, you're bound to meet some of her die-hard fans. Ya know, the ones who have all her books, take her classes, frequent her website, AND participate in her Yahoo group.

I'm not one of those people.

I like Friesen's humorous writing style. And I love her attitude towards making and selling things inspired by her works — one of the most generous artists in polymer clay from that standpoint.

But I'm just not that into her artwork. Mixing beads and jewels into clay sculpture doesn't really appeal to me, and that's what most of her books have focused on. To each her own — beauty is a very subjective thing. But for that reason,
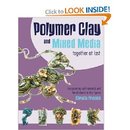
Polymer Clay and Mixed Media— Together at Last is the first of Friesen's books I've really read.

And the reason I was drawn to this one? I like incorporating mixed media items, especially found objects, into my art. So when Polymer Clay Daily mentioned this book together with Friesen's steampunk work, I got curious. Looking around Friesen's site, I really enjoyed her recent works — steampunk-style pieces that incorporated things like metallic gears. In fact, these were the first of Friesen's pieces that I really, really liked. And that's the reason I picked up the latest book. (A poor reason as it turns out, but more on that in a minute...)

Mixed Media Techniques

Happy Place ATCFriesen starts with a few clay basics (more are at the back of the book), then jumps right into the mixed media tips. I really like that she lists which items you can use before and after baking. Her list included a few things I might not have considered — things like hemp, raffia, and paintbrush bristles. It also seems like a handy list to help brainstorm your own additions. She's very good about encouraging experimentation: if you have some other material you want to add, try it (with the proper precautions) and see if it will work.

Right after her section on what materials to use is a section on how to use them. Her suggestion for how to attach porous fibers to polymer clay was new to me and very handy. I believe she's covered wiring beads (vs. gluing them) in her previous books, but it's also a worthwhile tip — one I certainly could have used in my earlier clay days.

The Projects

After her brief intro, Friesen jumps into the projects. Now let me say first that Lisa's right. The project photos on this book's cover don't help sell them. The largest photo has an out-of-focus section that is poorly cut out. It bugs me every time I look at it. The other photos are too small to show much detail.

Thankfully the photos inside are much better. Her many step-by-step photos are clear and helpful. And the projects themselves are a lot of fun. Some of my favorites:

  • Thistle Pin featuring paintbrush bristles
  • Grapevine Wreath featuring raffia
  • Porcupine using a broom for quills (ah... so that's what brooms are good for?!) :-)
  • Dragon frame using a fork for a spine
  • Cracked acrylic paint background
  • Assorted face hearts

Porky the Permed PorcupineI honestly wasn't prepared for how much fun I'd have creating these projects, even though they're not in my typical style. And I think some of the projects grew on me. Even though I'm not a caner, I am really eager to try the cane-covered turtle and starfish projects. The fact that the projects are pretty quick and easy makes them fun to try, even if they aren't your normal style. And of course, Friesen's humorous writing style adds to the fun. I mean, what's not to like about step-by-step instructions that tell you to take a chocolate break?

She has some neat extras too. Her eyelid chart may be my favorite part of this book: it demonstrates how the placement of the eyelids can completely change a sculpture's expression. It's a handy guide for those times when your sculpture ends up with a frightened expression and you want to know how to fix it.

I think die-hard fans of hers will like that many of these projects are complementary to those in her CF Sculpture Series. If you liked Dragons, you'll enjoy adding this book's "Thor's Dragon-Serpent" to your collection. There are also several projects with jungle and sea-life themes to match her Welcome to the Jungle and Under the Sea books. Fans of Friesen's will also like that this books is 160 pages long — more than 3 times longer than those in her CF Sculpture Series.

That "more of the same" aspect that her fans will love is my main complaint, though. While she does have a few really clever ideas (like the forks and broom straws), many of the projects seem very similar to her other work. She's always used lots of beads and precious stones in her work, and this book seems to focus heavily on those techniques too. It makes the "together at last" portion of the title seem a bit overstated.

Since I first read about this book in a post about Friesen's steampunk work, I was disappointed it didn't include any steampunk projects. There are a few metal projects mixed in (like using the forks), but it wasn't to the extent I'd hoped. (She does have a free steampunk heart tutorial on her site if you're interested.) Nor did I feel like there was much focus on found or recycled objects.

Still, it's a fun read with lots of clever ideas. There's a decent range of mixed media, and the projects are really enjoyable to do. I love that Friesen encourages trial and error, experimenting and improvising. She shares basic ideas, then lays the groundwork for the reader to do more projects on their own.

Summary

  • Cons:
    • A little heavy on the bead and precious stones projects (Friesen's usual style) and light on the metal and found objects projects. If you're hoping to create the cool steampunk stuff like Friesen's doing now, you won't find those instructions in this book.
  • Who It's Good For:
    • These projects are easy and well-illustrated, so polymer clay beginners should be able to jump in and have good results.
    • Folks looking to start including other media in their polymer clay work will find good tips here.
    • And any CF fans will, of course, enjoy this latest addition to the collection.

April 9, 2009

Rainbow filigree quail eggs by starlessdesignsIf you're planning on doing some polymer clay Easter egg crafts this holiday weekend, you may be wondering how to get started. Boiling eggs works for kids' crafts, but not so much for something you want to last a while! Here are three ways to prepare your eggs before covering them with polymer clay:

  1. The old-fashioned way. Blowing eggs out is the tried and true method. It works well and leaves just the tiniest of holes... but it can also be time-consuming and headache-inducing. Crafty Daisies has an excellent tutorial on hollowing out eggs.
  2. Operation: Egg. If blowing out the egg is not your thing, try operating on it. The book Altered Curiosities: Assemblage Techniques and Projects by Jane Ann Wynn recommends this handy method. Score the egg, then pop out the section you scored. Wynn recommends sealing it with epoxy to strengthen the egg and make it easier to work with (liquid clay should work just as well if you don't have epoxy). Bonus? This method is perfect if you want to create a diorama inside the egg. Hiding interesting things inside gives a whole new dimension to Easter egg hunting!
  3. Fake It. Both of those methods sound like too much work? Just use plastic eggs. It's a great way to recycle last season's mismatched egg halves. While lots of polymer clay crafters have successfully used various plastic eggs in their ovens, it's best not to assume anything. Test your plastic egg in a well-ventilated oven at clay temperatures BEFORE you invest a lot of time into covering it, just to make sure it won't melt. (Prefer not to chance it? Wooden or paper mache eggs are also options.)

Now that your eggs are prepped and ready, check out these ideas to get inspiration for your own polymer clay egg creations:

Here's hoping you have a "hoppy" Easter!

About this Site

CraftyGoat's Notes is all about sharing polymer clay tips & tricks that have worked for me. (And even a few that haven't!)

Read more about CraftyGoat's Notes...

Buy My Book

Archives

Enter your address to get CraftyGoat's Notes by email:

Delivered by FeedBurner