Polymer Clay Plant Markers... 2 Ways!
I love the idea of gardening. I want to snip fresh herbs to toss with pasta. Or make fresh salsa with homegrown tomatoes and peppers.
Unfortunately, my biological gardening clock (if there is such a thing) is a bit off. It's usually around Memorial Day weekend that it occurs to me to plant something. By this time, even the pre-started plants at the nurseries are on clearance, because (I'm guessing) everybody except me understands that it's too late to plant stuff. This does not deter me. I see an abandoned plant in a clearance bin, and I go into rescue mode. How could I just let that poor thing sit there and die, alone and unloved? So I bring home plants I shouldn't and do my best to save them from the coming blazing-hot summer days. Eventually the Oklahoma sun and dry winds win, and I give up on the poor wilted plants. But by Memorial Day of the next year, I'm ready to give it another shot.
A few years back, I (unintentionally) did something smart. I got some perennial herbs, oregano and sage, that have made a happy life for themselves despite my lack of gardening expertise. Both of the past two years, these herbs have come back without a bit of effort on my part. Since these plants make me so happy, I decided to make them a little gift in return.
These polymer clay plant markers are simple to make and they're a great way to identify your favorite plants... whether you're the type who starts them from seedlings, or — like me — just feel fortunate that the plants have chosen to grace you with their presence one more year. I'm showing you how to make two slightly different styles of plant markers. The first is a more sculpted look, and it's great for flowering plants, fruits, or veggies. The second is a more natural look, well-suited for an herb garden. Both projects start and end the same way — it's the step in the middle that make the difference.
Plant Marker Instructions
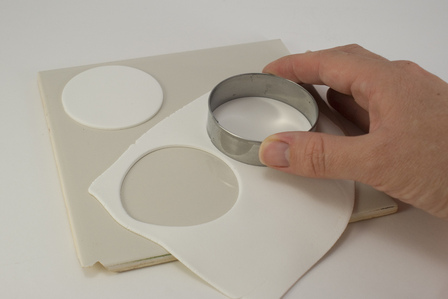 Create Background. I chose UltraLight Sculpey as the background for my plant marker because it's lightweight — less likely to make the wooden stakes top-heavy. Roll the clay out to a medium-thick setting on your pasta machine and cut out two copies of any shape you want. I used a round cookie cutter.
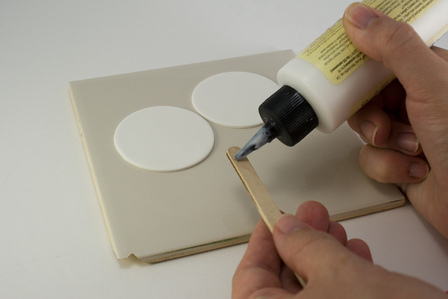 Add Stake. Apply Bake and Bond bakeable adhesive to both sides of the end of a craft stick. Apply a little Bake and Bond all over one of your clay sheets, too. Then sandwich the stick between the sheets, pressing lightly to adhere everything together. I did the remainder of the project on a bakeable surface (try a ceramic tile or an index card), so I wouldn't have to move the project for baking. If you have to move it, do so carefully, sliding an aluminum scraper underneath the bottom clay layer. Don't forget and grab it by the craft stick, since this will likely pop the stick right out of the unbaked clay.
Bake and Bond Note: I like to use Bake and Bond in cases like this because it seems to have some of the properties of white glue and some of the properties of liquid polymer clay. If you don't have Bake and Bond, you can use white glue instead.- Decorate Marker
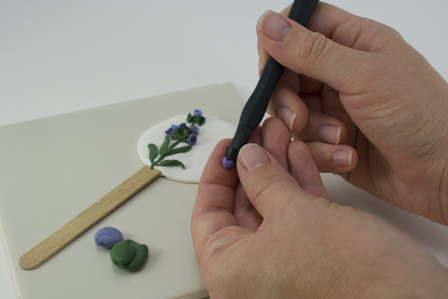 Sculpted Plant Marker: I'm sure you have different plants than I do, so I'll just give general instructions on sculpting a plant. First, study the plant. If you don't have the plant itself in front of you — very likely if you're just starting the seedlings — then you'll have to settle for studying a seed packet, a photo from a plant book, or a botanical drawing. Look at the leaf shape, color, texture and placement. Are there always a certain number of leaves or flowers grouped together? What makes this plant unique? Understanding these things will help you create a better likeness.
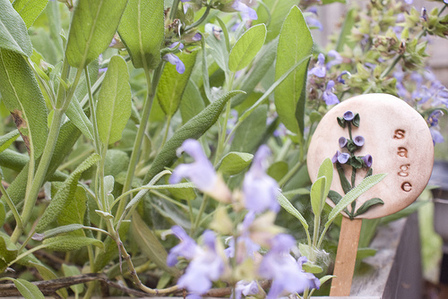
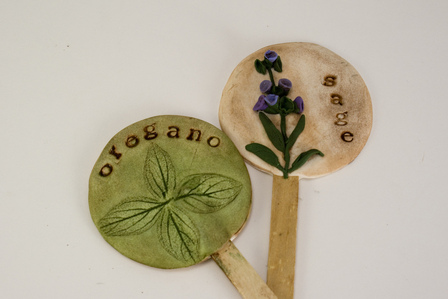
For my sage marker, I mixed a green color consisting of 1 part each Premo Green, Sea Green, White, and Raw Sienna. I tried various methods of getting the raised dot look of a sage leaf, but I wasn't happy with any of them until I "cheated" and used an actual sage leaf for texture. For the flowers, I made tiny balls from a few different shades of lavender. I then poked my Sculpey cone tip shaper tool into the ball, and pinched out the edges to make them look like petals. I followed the same steps with green balls and wrapped those around the flowers to make the leaves at the base of the petals.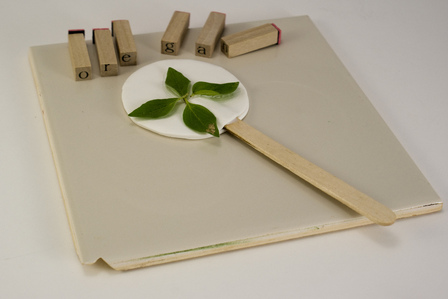 Leaf Impression Plant Marker: You have to actually have some of the plant's leaves on hand, so this style doesn't work so well if you want to mark where you planted seedlings. (Plan ahead and make some for next year!) Pick a few fairly unblemished leaves, and press the backs of them into your clay background (the details from the leaf back usually transfer more clearly than those on the front). Once you've made a good impression in the clay, peel the leaves off.
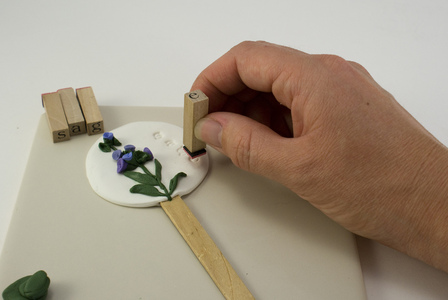 Label It. Once you're happy with the decorative part of the plant marker, use rubber stamps to impress the name of the plant into the clay. I used an Alphabet Stamp Set by Studio G. You can also add any other texture, borders, etc. at this point.
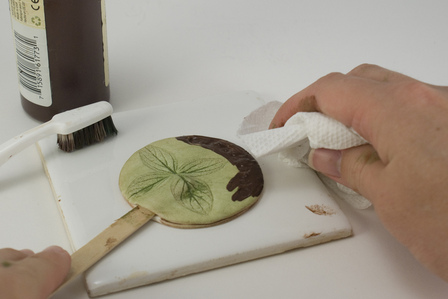 Bake and Antique It. Bake the plant marker according to the clay manufacturer's instructions, keeping the craft stick in place (wood is oven safe at clay temperatures). Once it's baked and cooled, apply acrylic paint to a stiff-bristled paintbrush or an old toothbrush. Dab the paint into the letters and any other textured areas, making sure the paint gets into all the crevices. Then wipe away the paint on the surface with a paper towel. This highlights the textured areas and gives the piece an antiqued look.
UltraLight Sculpey Note: I was in for a surprise the first time I antiqued UltraLight Sculpey. The stuff is made to be paintable, so it absorbs the paint much more than a brand like Premo. If you don't work quickly when you're antiquing, you'll find the paint has become permanent.- Protect It. Polymer clay colors can fade in the sunlight. If you're creating your plant markers for an outdoor garden, seal your clay with a topcoat that includes UV protectorant, such as Rust-Oleum's Varathane polyurethane wood sealant.
Of course, there are lots of variations. These plant markers are two-sided. Try decorating the back in a different style, or even doing an image transfer with details about the plant and its sun and watering preferences. Use an extruder to create a matching (or contrasting) polymer clay border. Change the shape and size of the background. Vary the antiquing color to make (for example) all your herb markers green, all your veggie markers yellow, etc.
I'd give you more ideas for variations, but I've got a trip to make. I believe some clearance rack plants are calling my name. :-)
This post is part of the Craft Social Garden Party Blog Carnival. Check out the other posts for more garden-fresh inspiration!


Comments
I've been thinking of making some plant markers from polymer clay for ages, the ones I had in mind weren't as classy as yours. Thanks for the instructions I shall perhaps make mine that way and have a classy garden too!
Posted by: Cara | May 22, 2010 1:13 PM
These are really nice Angela! I just planted some of my favorite herbs into some large pretty pots. Some markers would look really nice in there! I will let you know when I make them and share the photos with you....
Posted by: 2 Good Claymates | May 24, 2010 8:48 PM
Thanks Cara & Carolyn -- would love to see both of your plant markers!
Posted by: Angela Mabray | May 25, 2010 10:41 PM
So cool! As soon as I start my herbs garden, I will try to do it! Very creative.
Posted by: Flavia | June 21, 2011 6:25 PM
Wonderful, Flavia. I'm afraid that (at least for me) the plant markers are the easy part... it's the herb garden that takes LOTS of work! :-)
Posted by: Angela Mabray | June 30, 2011 4:03 PM
Love this idea--i must make some for my garden soon!
Posted by: katie | March 28, 2012 8:42 AM