Project: Leaf Pendant with Liquid Clay and Alcohol Inks
I was sad to learn that my favorite local rubber stamp store was going out of business after many years. Admittedly, I hadn't visited much lately, but I'd sent many folks their way... and I just liked knowing they were there. So on their final week, I had hubby watch the kiddos while I shopped their 75% off sale. I was thrilled to get to stock up on some new colors of alcohol inks, and I found some fun new stamps.
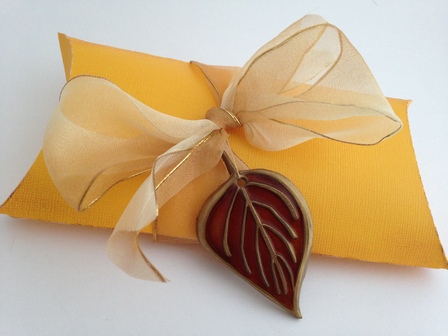
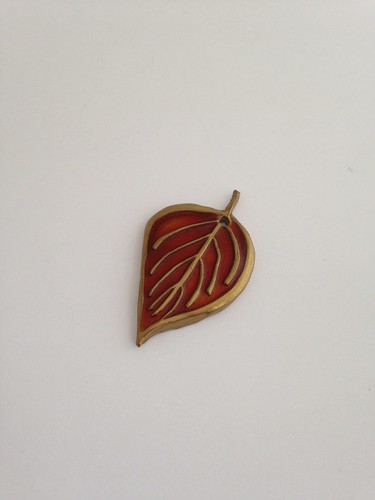
I decided to combine those finds to make some pretty autumn leaf pendants in the style of Isabelle Ceramy-Debray's faux enamel from Polymer Clay Beaded Jewellery (reviewed here). My pendants are actually serving multiple purposes here: I'm using them to decorate some autumn gift bags and pillow boxes, after which the recipients can string them onto a necklace of their choice.
Here's what you need to make this project:
- Rubber stamps (more on how to choose good stamps for this technique below)
- Super Sculpey, or molding material of your choice
- Water spray bottle
- Clay blade
- Polymer clay, any color * (see Materials Note below)
- Pearl-Ex powders in metallic colors *
- Paintbrush *
- Baking tile
- Alcohol inks
- Liquid polymer clay, such as Translucent Liquid Sculpey (TLS) or Kato Liquid Polyclay Clear Medium
- Toothpick
- Straw or needle tool for creating pendant hole
- Heat embossing gun
Materials Note: Some special effects clays have mica powder pre-mixed into them. While I preferred the results when I brushed Pearl Ex powders onto the clay surface, you could use a special effects clay and skip that step. I show both variations in the picture at the end of this post.
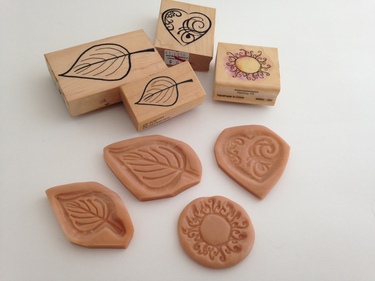
Create Reverse Mold from Stamp. Start by choosing a stamp. My preference is deeply cut rubber stamps — not clear acrylic, as they tend to be shallower. For this technique, a stamp with open areas is nice. These open areas are the parts you'll fill with alcohol inks.
To make a reverse mold of your selected rubber stamp, first mist the rubber stamp with water. Condition a ball of Super Sculpey that's similar to the size of your stamp image. Place the clay ball on your baking surface, then press the stamp evenly and firmly into the clay. If your image isn't quite right, you can just roll the clay back out and try again. Bake your mold for the recommended time.
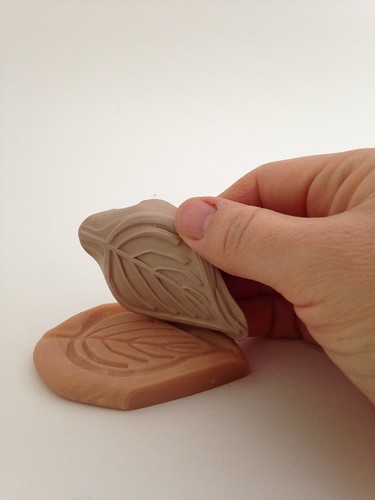
Use Mold to Create Pendant. Condition a small amount of polymer clay. The color of this clay doesn't much matter, since you'll be covering it with Pearl Ex powders. Spritz the baked mold with water and push in your clay, making sure you get the clay fairly flat on the back of the mold. Otherwise, you'll end up with a slope and will have a hard time getting the liquid clay to flow to all the open areas. Extra clay around the edges is fine; you can trim that off with a clay blade after you pop the clay out of the mold.
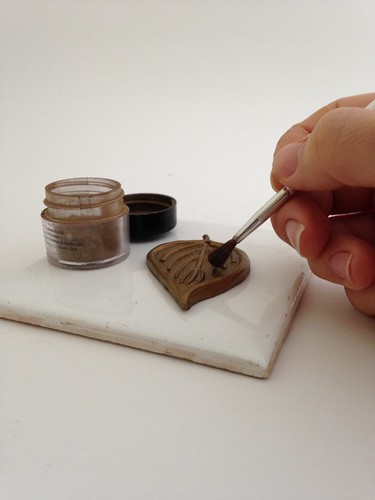
Brush with Powders. After trimming the excess clay, smooth the edges with your fingers. If you'll be using this for a pendant, now's the time to use a straw or needle tool to punch a small hole near the top. Next, use a paintbrush to brush Pearl Ex powders all over the unbaked clay pendant. I tried Aztec Gold, Sunset Gold, and Super Bronze, and liked the latter two best for an autumn effect. (See the labeled photo at the end of this post for results of the different powders.) I also covered the back with powder, but you may choose to texture the back of yours or finish it using a different method. Once you're happy with your pendant, bake it according to the clay manufacturer's instructions.
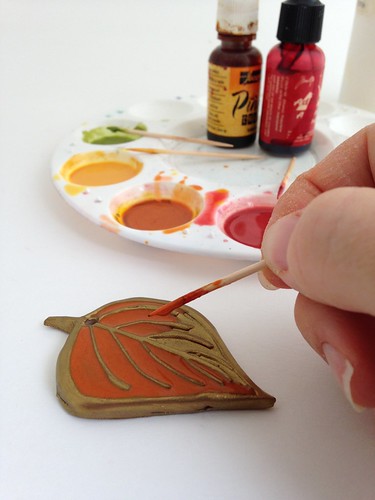
Add Tinted Liquid Clay. Now you're ready for the fun part — tinting your liquid polymer clay with alcohol inks. I usually use a hefty squirt of liquid polymer clay and start with 1-2 drops of alcohol ink. According to what I've read, it's best to let the drops of alcohol ink sit for a few seconds on top of the liquid clay before stirring them in. This apparently lets the alcohol part evaporate off, which helps prevent bubbles. (I've not run my own experiments, but I generally follow this advice.) Alcohol inks come in many beautiful colors, but you can certainly mix them to make your own custom colors as well.
Before applying your liquid clay mixture to the baked, cooled pendant, use a clean paintbrush to dust off any excess Pearl Ex powders. Use a toothpick to drip your liquid clay mixture into the larger open (recessed) areas of your pendant. Then drag the tip of the toothpick to pull the liquid clay into the smaller open areas. If I'm doing more than one color of liquid polymer clay for a pendant, I prefer to cure between colors; otherwise it's too easy for the colors to bleed together.
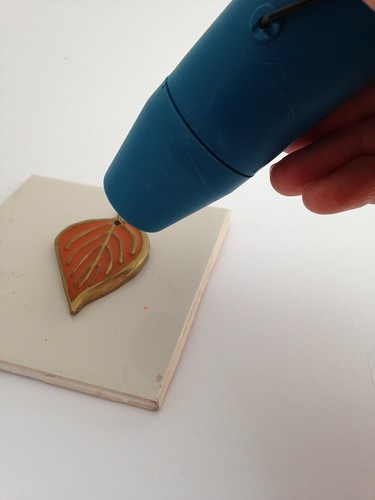
Heat Emboss Liquid Clay. Cure the liquid polymer clay according to the manufacturer's instructions. I usually remove my piece from the oven after its recommended cure time, and hit it as soon as possible with the heat embossing gun. Keep the heat gun about an inch away from the piece, moving it around constantly to prevent any single spot from burning. I like to keep my piece angled towards the light so I can tell when the surface appearance starts to change. The liquid clay first starts to look dull and a little white-ish, then it changes to a clear glass-like finish.
Add your finished pendant to a pretty package for a lovely hostess gift, or string it onto a ribbon or cord for a beautiful necklace. I used my Silhouette Cameo to make some textured cardstock into a pretty pillow box.
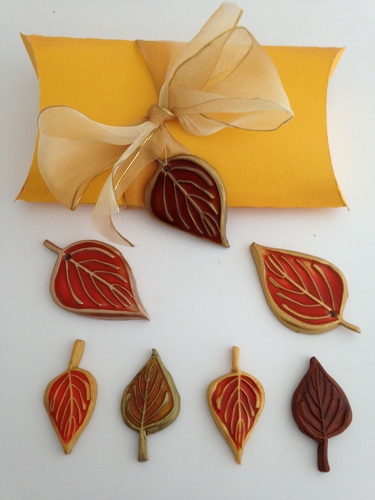
Here are the results from some of the different products I tried:
- Main top pendant (attached to pillow box): Sunset Gold Pearl Ex powder on tan polymer clay; mixture of Cranberry, Santa Fe, and Red Pepper alcohol inks
- Large pendant, left: Super Bronze Pearl Ex powder on tan polymer clay; mixture of Terra Cotta and Tangerine alcohol inks
- Large pendant, right: Aztec Gold Pearl Ex powder on tan polymer clay; mixture of Terra Cotta and Tangerine alcohol inks
- Small pendant, left: Gold Pardo Jewellery Clay with no additional mica powders; mixture of Cranberry, Santa Fe, and Red Pepper alcohol inks
- Small pendant, second from left: Antique Gold Premo with no additional mica powders; mixture of Lemonade, Butterscotch, Terra Cotta and Tangerine alcohol inks
- Small pendant, second from right: 18K Gold Premo with no additional mica powders; Terra Cotta and Tangerine alcohol inks
- Small pendant, right: Tiger's Eye Pardo Jewellery Clay with no additional mica powders; mixture of Lemonade and Butterscotch alcohol inks
I'm not sure how much it shows up in the photo, but I personally didn't think the metallic clays had the same appeal as the Pearl Ex-covered clay. Still, if you were making a big batch of these, it might be worth it to you to skip that extra step. I also found that the light-colored liquid clay mixtures really disappeared on a dark background. Still pretty... just not what I wanted here.
I hope this month finds you with many things to be grateful for. I would love to hear from you... What are you creating?

