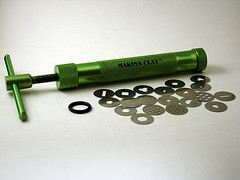
" /> CraftyGoat's Notes: May 2008 Archives

« April 2008 | Main | June 2008 »

May 29, 2008

Back when I got my Makin's Ultimate Clay Extruder, the packaging was a bit on the sparse side. I had a little trouble figuring out where things went, what that O-ring was for & how exactly I was supposed to use the thing.

That's been a few years now, so Makin's may have improved the packaging. But just in case anyone else is puzzled, here's some instructions on how to use and clean your Makin's extruder.

How to Use It

  1. Step 1: OpenOpen the extruder by unscrewing the green cap at the bottom.
  2. Step 2: Twist HandleTwist the handle until there's enough room in the barrel for the amount of clay you want to extrude. Check to make sure the black rubber O-ring is in place, pushed against the plunger piece inside the barrel. (See update below.)
  3. Step 3: Insert Clay Use conditioned clay, rolled into a cone about the same diameter as the extruder tube. Insert clay into barrel. Note: You're not limited to Makin's brand clay. I've successfully used Premo, Studio by Sculpey, and mixtures including other brands... maybe everything except Makin's!
  4. Step 4: Re-Assemble Pick which extruder disc shape you want to use. Place this on the open end of the tube, and screw the green cap back on to hold the disc in place.
  5. Step 5: Extrude Twist the handle to push the clay through the extruder disc. You'll notice a bit of resistance as you get to the end of the clay. Don't force it past this point! In fact, I usually give the handle about a half a turn in the opposite direction before I unscrew the bottom cap. This relieves the pressure and makes it easier to take it apart.

How to Clean It

The black O-ring does an excellent job of scraping the barrel's sides as you extrude, so the Makin's extruder is usually self-cleaning. Still, here's a couple of cleaning tips for when things get extra-messy.
  • Cleaning Plunger To clean the plunger, remove the bottom cap and twist the handle until the plunger is exposed. Use a paper towel or a piece of scrap clay to remove any excess clay on the plunger. (Makin's has a photo tutorial here.)
  • To clean the O-ring, twist it inside out between your fingers. The clay should pop off as you twist.

Stay tuned for tips on getting the most use out of all those discs that come with your clay extruder.

Update 6/4/08: Jenny from Quilted in Clay left a comment cluing me into the actual purpose of that O-ring in the extruder package. It's a spare part for the O-ring that's already hidden inside the extruder, sandwiched between the bottom and top piece of the plunger. Yeah, that makes way more sense than the way I was using it. While it probably doesn't hurt to do it the way I originally said above, after running doing a few tests, I don't think it helps either. I've changed the appropriate places in my post to reflect this. Thanks so much to Jenny for her correction.

Also, one cleaning tip I didn't mention previously. If you get clay in the threads of the screw-on cap, it can keep it from closing securely. Just run a toothpick or needle tool around them to remove the build-up.

Posts In This Series:

Buy the Makin's Ultimate Clay Extruder now.

May 27, 2008

Makin's Ultimate Clay Extruder
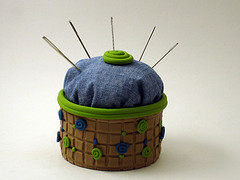
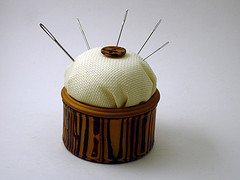
After last week's Polymer Clay Pincushion post, I got a friendly email from Susanna. She asked,

"I just wanted to know if you had any advice on extruding clay using a clay extruder. I have so much trouble pushing the clay out and then cleaning it afterwards! Do you have any tips on how to make it easier?"

Ugh. I knew almost without asking that Susanna was using the old silver plunger-style extruder. I knew that because I lived with my plunger-style extruder for years, and so I recognized her frustration.

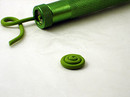
I "treated" myself to a Sculpey Clay Extruder not long after I started using polymer clay. "Treated," I say, because it was definitely a mixed blessing. The effects you could achieve with the discs were cool. Some of the shapes would have been very difficult to create without an extruder.

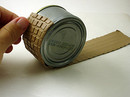
But it turned out they were also difficult to create with the extruder. My hands ached after using that thing. And Susanna's right -- it was difficult to clean. I looked for suggestions online and tried a few. Glass Attic's tip on baking a clay plug to clean the extruder barrel was the most memorable of my failures. That extruder was (literally) a pain to use and a pain to clean.

So I stopped using it.

I skipped over projects that required extruders. I did my best to roll out my own perfect clay snakes when I needed them. I avoided using that old thing whenever possible.

One day, I heard about Makin's Ultimate Clay Extruder. People raved about how much easier to use and clean it was. It sounded interesting, but for the most part, I ignored them. After all, I didn't use the extruder I had, so it was hard to justify buying another.

That's where I was wrong. After I finally caved in and bought the Makin's Extruder, I realized that this is one case where tool quality makes all the difference. I'm no longer reluctant to use my clay extruder. It's so easy to use and easy to clean that I'll pull it out even for small jobs.

Here's an overview of the Makin's Clay Extruder, in case you've been holding out on buying one too.

Pros

  • Easy to use. Doesn't hurt your hands like the cheaper silver plunger-style extruders.
  • Easy to clean. The rubber O-ring inside takes care of most cleaning for you.
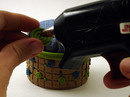
  • Nice variety. The included 20 discs give you lots of shape options. If you need more, there are 2 10-disc add-on sets available. You can also buy core adapters, which you use along with your existing discs to extrude hollow shapes.

Cons:

  • Price. The Makin's Clay Extruder will probably cost you at least twice as much as the cheaper silver type.

For me, the pros far outweigh the cons. Yes, the Makin's Clay Extruder is expensive. But in this case, you get what you pay for. The Makin's extruder is a much better tool, and it's much more enjoyable to use.

Stay tuned in the coming days for an explanation of how to use & clean the Makin's Ultimate Clay Extruder, plus a few tips & tricks on getting the most out of your extruder.

Posts In This Series:

Buy the Makin's Ultimate Clay Extruder now.

May 21, 2008

Screen Shot: Amazing Crafting Products InstructionsThe folks at Amazing Mold Putty contacted me a while back. Apparently they enjoyed some of my photos & videos, and wondered if they could use them on their website. I agreed, but forgot to check it out until a couple of days ago. They've included several links to this site from both their Instructions and Gallery pages.

I mention this for several reasons. I'm glad they liked the photos enough to feature them, and I wanna welcome folks who are visiting from their site. (Welcome!) But I also mention it because it prompted me to set up a "Related Entries" feature, which you should start seeing at the bottom of each post, just below the words "Like this? You might also like..." This list of related articles is automatically generated based on how I tag my articles. If I've tagged an article with "Amazing Mold Putty," it should link to similarly-tagged articles. Which means that all you new folks who followed the Amazing Mold Putty site's link to this older tutorial will hopefully also find your way to the one I just posted recently.

While I was tinkering under the blog's "hood," I also added another feature we've been needing for a while: Comment Subscriptions. If you want to be notified when new comments are added to a blog post, just checkmark the "Receive an email when..." box when you comment. This is especially useful for folks who are asking a question -- now you can get notification sent to your inbox, instead of having to check back frequently for answers.

I'll be manually updating tags on older posts over the next few days, so those of you reading this through a feed reader may get some older items marked as new (sorry!). Aside from that, I'm hoping these new features will work seamlessly. But if you have any problems, just let me know.

May 18, 2008

Green and Blue PincushionA couple of years back, I bought one of those generic wood-handled sculpting tool kits at Michael's. While I had no idea what most of the tools were for (& still don't for some of them!), I quickly came to rely on its needle tool. I used it for all sorts of things -- poking, cutting and otherwise. It didn't dawn on me for quite some time that I could have easily made my own needle tool. Furthermore, it wasn't til I was working through Katherine Dewey's Creating Life-Like Animals in Polymer Clay that I saw the benefit of having different-sized needles for different jobs.

I stepped out of my comfort zone and visited the sewing section at the store, stocking up on half a dozen tapestry, sewing & knitting needles to work through Dewey's book. And for the last several weeks, I've had these needles sitting casually on my craft desk... the same desk from which things often mysteriously disappear and which cats have been known to raid.

So I was thrilled when I saw this tin can pincushion project by Design*Sponge. Said cats generate more than their share of kitty food cans to use for the project, and of course I like the recycling aspect. I decided to try making a polymer-clay covered pincushion to store my sculpting needles, so they'd be in a slightly safer environment.

Here's how I made mine:

Materials

  • Clean tin can, such as for cat food
  • Liquid polymer clay
  • Polymer clay
  • Clay extruder
  • Amazing Mold Putty and old button to make button mold (optional)
  • Fabric
  • Poly-fill
  • Glue gun

Instructions

  1. Pincushion Step 1: Cover Can with Clay

    Cover can with clay. I started by covering the can with a very light coating of liquid polymer clay. Design*Sponge has an excellent suggestion for using the can's label to create a template. Keep in mind that you may need to add a bit to that if you want to hide the top rim. Your other option is to skip the template and just roll the can on a sheet of clay til the edges meet. (Need help with this? Check out my pen-covering tutorial for the basics.)

    Once you've covered the can with clay, smooth the seams and embellish however you like.

  2. Pincushion Step 2: Adding Extruded Clay to RimAdd extruded edge. Use your clay extruder to roll out a clay snake long enough to go around the can's rim. Close any gaps between the clay sides and the extruded edge, and smooth the seams where the extruded ends meet.
  3. Pincushion Step 3: Make Matching ButtonCreate matching button. You can use your clay extruder to create a matching button. Or use a button mold to create a matching button from polymer clay (see example below). Bake can and button according to the clay manufacturer's instructions.
  4. Pincushion Step 4: Attach Button to Assembled PincushionStuff pincushion & assemble. While the clay is baking, follow Design*Sponge's instructions to create the fabric portion. Once the clay has baked and cooled, you can start assembling your pincushion. If you're comfortable with these sort of things, you can sew your baked button onto the middle of the fabric first. Otherwise, you can use a glue gun to attach it after assembly.

Faux Wood PincushionThis is a very quick project that you can vary greatly by using different clay and fabric combinations.

And of course, these pincushions aren't just useful for storing sculpting needles. Try making one as a gift for your favorite seamstress or fiber artist.

Not the DIY type? You can also buy these pincushions at my store.

May 16, 2008

Box of Pearl and Embossing PowdersHere's a quick tip for storing your Pearl Ex & embossing powders so it's easy to find the right color at a glance.

I used to store my Pearl Ex powders in their original box, carefully organized numerically (because I'm picky that way). However, when I reorganized the last time, I found that it made more sense to keep all the pearl & embossing powder bottles together in one large box. While this worked much better from a storage aspect, it created two new problems:

  • It was trickier to keep them in just the right order, something that was important if I was using my Pearl Ex Color Strip to find the right color.
  • The original Pearl Ex boxes stored the bottles vertically, so I could see the color from the side. In my new storage box, all I saw was their little black lids, which all look exactly the same.

To fix these problems, I spent a little time creating samples and labelling the lids:

  1. Labeled Embossing PowdersEmbossing Powder Samples: As you probably know, powders often look very different on a dark background than they do on a light background. For the embossing powders, I punched circles from black & white card stock, then used embossing ink & a heat gun to create samples of each powder color. I glued half of each circle to the embossing powder lid. (I used the other half to create a paper reference guide, in case I want to take a list of what I have to the store with me.)
  2. Pearl Ex Samples: I had already made sample strips of Pearl Ex powders on black and white clay. I simply cut these apart and super glued them on top of the appropriate bottles.
  3. Labelling Lids: I then wrote the color name on top, just in case I was looking for something specific. (Metallic pen worked well for the Pearl Ex powder's black lids.) I almost wrote in the numbers too, but then I would have felt obligated to keep them in order. And believe it or not (hubby does not), I occasionally try to reign in my compulsive tendencies! :-)

If I were doing this again, I would make thin clay sheet samples instead of using the bulky strips I had. Since my lids aren't flat, I can't stack those bottles now. It's not a big deal for me -- but it might be something to keep in mind if you try it at home.

May 14, 2008

A Perfect SquareNeed to cut a polymer clay square but don't have the right size cookie cutter? Here's an easy way to get a perfectly straight-edged square (or rectangle) every time:

  1. Step 1: Find graph paperFind a sheet of graph paper. If you don't have any -- or if the grid on yours is the wrong size to be useful -- you can print your own graph paper online, selecting just about any size grid you like. If you know what size you need your polymer clay square to be, count out how many squares that equals on the grid (i.e., 7 across by 7 down). It may be helpful to outline the edges with a pen or highlighter, especially if you'll be re-using the template to cut lots of pieces the same size.
  2. Step 2: Lay clay on wax paperPlace the graph paper under a sheet of wax paper. (Working directly on the paper could lead to an accidental image transfer.) Roll out a sheet of clay to the desired thickness, and lay it on top of the wax paper. It helps if you press it down lightly so it sticks to the wax paper -- that way it won't wiggle while you're cutting.
  3. Step 3: Cut the ClayLine up your clay knife with the grid lines, and cut out your square. Viola -- perfect every time!

This post is the first in a new category on my blog: Quick Tips. It'll be a spot for me to jot down interesting observations & quick tricks I've found useful -- and with any luck, a spot where you'll discover some new things now & then too!

May 12, 2008

I enjoy doing experiments with polymer clay. I like creating my little "control group," then trying various things with the other groups. I think it reminds me of my high school science club (yep, I was a geek!). Or maybe I just feel like a mad scientist, running horrific experiments on my helpless polymer clay subjects. :-)

But as much as I enjoy doing these experiments myself, I think I enjoy it even more when someone else does one and shares their results. I love looking at the photos -- I'll often hold up my laptop screen til it's just inches from my eyes and study the differences intently. (This always earns me a funny look from my husband!)

So I've been excited to see several good experiments shared in the polymer clay blogosphere lately -- and I wanted to make sure you had a chance to check them out, too:

  • Jenny at Craft Test Dummies compares Kato Liquid Polyclay, TLS & Fimo Deco Gel for top coat and layering applications. I've preferred Kato over TLS for these uses for a while -- so I was especially interested in Jenny's impressions of the Fimo brand, which I haven't tried. It's a nice thorough report.
  • I've heard speculation before on whether adjusting the clay formulation yourself (through leaching or adding mineral oil) would affect its strength -- but I'd never actually seen tests on it. Cynthia Blanton ran strength tests on leached Premo and found some problems.
  • Michael at MossyOwls made polymer clay buttons, then tried a variety of finishes (liquid clay, acrylic paint, etc.) to see how they'd hold up in the washer & dryer. This is something I've always wondered about & her results aren't what I would have expected. Check them out!

Thanks to these gals for taking time to document their great tests... keep up the good work!

Update: Garie Sim just added a great article yesterday: Creating Your Own Colored Liquid Polymer Clay. Garie's site frequently features wonderfully-done, thorough experiments, and this comparison of how well the different liquid clay brands accept oil paint tinting is no exception.

May 9, 2008

Finished Card and NecklaceStill looking for a gift for mom? Look no further than your craft supply stash! Here's an easy way to make a matching card and necklace — perfect for Mother's Day or any other time you need a quick handmade gift. The card features a bottle cap button embellishment made from polymer clay, and the necklace features a matching pendant.

Materials

  • Buttons. Raid that button jar to find a design you like. The large ones (just about the same size as the inside of the bottle cap) work great.
  • Amazing Mold Putty or molding compound of your choice
  • Bottle caps. For this project, I like the fluted ones, which are available in craft stores or online. You could also use recycled bottle caps that you've flattened.
  • Patterned paper & card stock for the card
  • Rubber stamps (optional)
  • Polymer clay to match your paper
  • Large jump ring, jewelry findings, & cord for the necklace
  • Tools: hammer & nail, plus assorted paper crafting, polymer clay & jewelry making tools

Instructions

  1. Step 1: Make Button Mold Use Amazing Mold Putty to create a mold of your button. Let this set.
  2. Step 2: Punch Hole in Bottle Cap Use a hammer and nail to punch a hole near the rim of the bottle cap you're using for the necklace. Feed a large jump ring through the hole.
  3. Step 3: Make Button from MoldUse polymer clay and your mold to create buttons in your desired color. (Note: Decide which paper you're using first, then mix your clay to match that color. It's much easier to do in this order than vice versa!)
  4. Step 4: Place Button in Bottle CapPress the unbaked polymer clay button into the bottle cap, smoothing the edges as needed. If the button is too small, you can use a clay extruder to add a border around the edge. Bake your bottle cap according to the polymer clay manufacturer's instructions.
  5. Step 5: Assemble CardFold a cardstock base and apply your scrapbooking paper. If you need some help coming up with a layout, check out this random layout generator (it's meant for scrapbooks, but you can make it work for cards with a little imagination!), or search for "card sketches." Decorate the card with rubber stamps and/or other embellishments, then use a strong double-sided tape to add your bottle cap embellishment.
  6. Step 6: Assemble NecklaceFor the necklace, string the bottle cap onto your cord and add necklace closures.

Variations

  • Variation: Stacked ButtonsTry stacking different colors of buttons for a trendy look.
  • Instead of (or in addition to) a necklace, make earrings or a ring.
  • Different finishes can give one button lots of different looks. Try adding chalk or Pearl Ex before baking. Alcohol inks, acrylic paints, or clear glazes are good options after baking.
  • Insert your own variation here. (I'd love to see what you come up with!)

I hope you have a wonderful weekend with your family this Mother's Day!

May 4, 2008

Glitter Poll Results: 64% Pro, 23% Anti, 14% OtherA few days ago, I asked your feelings on glitter: love it or hate it? And while the strongly-worded options may have influenced folks' answers, I think Laurel was onto something when she commented that people tend to be "vehement one way or the other about glitter." After 22 comments, here are the results:

  • Pro-Glitter: 14 comments (63.6%)
  • Anti-Glitter: 5 comments (22.7%)
  • On the Fence ("Love/Hate Relationship", etc.): 3 comments (13.6%)

Looks like I am in the minority, as a crafty "glitter-hater" -- but at least I'm not all by myself!

As for the drawing, the randomly-selected winners are:

  • Penni Jo for her pro-glitter comment: "All glitter has its own charm and place in the world."
  • Beth for her anti-glitter comment: "Add glue to the mix and it becomes a blob monster determined to get me! I can't handle it without it taking over every thing I own."

I'll be contacting the winning commenters shortly -- so if you're one of them, be sure to keep an eye on your email for instructions on receiving your prize.

If you haven't read through the comments yet, there's a lot of fun ones. My faves include these:

  • Dez likes the glitter cloud that rises up when she sits in her favorite chair.
  • Jenny's son was born with glitter on his head.
  • France mentions the difficulties of being taken seriously in a business meeting when you've got glitter on your face!

Thanks for all your great comments -- & for helping me get rid of those yucky old glitter bottles once & for all! :-)

May 2, 2008

Mineral OilMineral oil is cheap and easy to find -- your local pharmacy probably has a big bottle of some generic brand available for less than a dollar. And that makes it a darn good value for a surprisingly versatile craft supply.

Here's 6 reasons you need to buy a bottle of mineral oil for your craft space:

6 Uses for Mineral Oil

  1. Cleaning your hands. Mineral oil works so much better than alcohol for wiping highly-pigmented colors of clay off your hands. I just rub a little dab of mineral oil into my hands, then wipe it off with a paper towel (repeating if necessary). And it's not just polymer clay that it's good for either -- mineral oil is also very helpful for getting alcohol inks off your hands... which isn't an easy task otherwise!
  2. Cleaning your supplies. Glass Attic recommends using mineral oil to clean your cutting blade. You can also use it in combination with dish soap or rubbing alcohol to clean your pasta machine.
  3. Conditioning old clay.
  4. Thinning polymer clay & liquid polymer clay:

    Be sure to check out Jeanne Rhea's experiments comparing mineral oil to Sculpey diluent for liquid clay mixtures. The diluent mixture seems to be clearer and stronger, making it a better choice for certain projects.

  5. Using as a release agent. Apply mineral oil first to glass, metals, or styrofoam to act as a release agent. Glass Attic also recommends applying it to your bead corer to prevent sticking.
  6. Smoothing clay before baking. MossyOwls suggests brushing down clay with mineral oil before baking to help reduce fingerprints.

Did You Know...?

According to Wikipedia, baby oil is just mineral oil with added fragrance. So if you happen to have baby oil around, you can substitute it for any of these mineral oil uses.

Your Uses for Mineral Oil

Got a favorite tip for using mineral oil? I'd love to hear it!

About this Site

CraftyGoat's Notes is all about sharing polymer clay tips & tricks that have worked for me. (And even a few that haven't!)

Read more about CraftyGoat's Notes...

Buy My Book

Archives

Enter your address to get CraftyGoat's Notes by email:

Delivered by FeedBurner