
Recycled Tissue Paper Postcards

The postcards are made from cereal boxes and recycled tissue paper. Or other stuff (see more suggestions in the materials). And the possibilities are pretty much unlimited.
Materials
- Paperboard. You can recycle this from cereal boxes, soda can boxes, Kleenex boxes, etc. If you don't have those, you could use heavy duty poster board or cardstock.
- Tissue paper. Old, crumpled stuff works fine. You could also use other patterned paper products, such as paper tablecloths or paper napkins (if using 2- or 3-ply napkins, make sure to separate the layers first)
- Adhesive. I used decoupage glue (i.e. Mod Podge or Crafter's Pick) for my project. A Xyron machine or spray adhesive would also work.
- Decorations. Stamps, paint, antiquing inks, chalks, glitter, etc. (Nothing 3-D, though, or it won't qualify for the postcard rate.)
Instructions
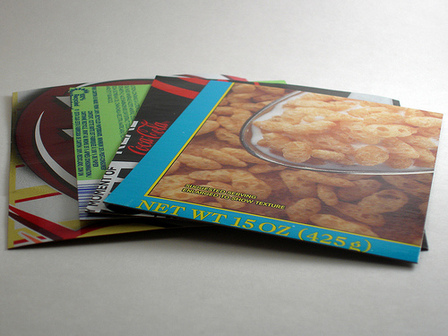 Cut the paperboard to size. The post office has rules about postcard sizes: they must be at least 3.5" high x 5" long, but no larger than 4.25" high x 6" long. There's also an aspect ratio requirement for the postcard rate. The aspect ratio, which you determine by dividing the card's length by its height, must be between 1.3 and 2.5. For example:
- A 4.25" high x 6" long postcard has an aspect ratio of 1.4 (6 divided by 4.25). It qualifies for the postcard rate. Other good sizes include 4" × 6"; 4" × 5.25"; and 3.5" × 5".
- A 4.25" high x 5" long card would not qualify since its aspect ratio is 1.2.
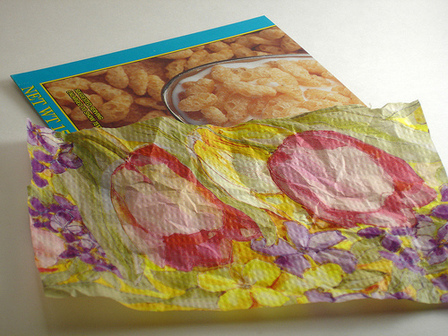 Cut a piece of tissue paper that's slightly larger than your paperboard. I like for my postcards to have a little extra texture, so I gently crumple then un-crumple the tissue paper.
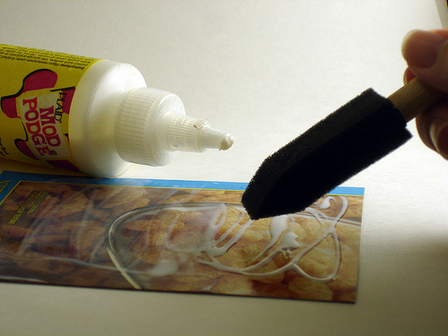 Spread a thin, even layer of glue onto the printed side of the paperboard.
 Gently place the tissue paper onto the glue and spread it flat. One advantage of crumpling it first is you don't have to be perfect during this step. Wrinkles and air bubbles look intentional. Just make sure all the edges are well-adhered.
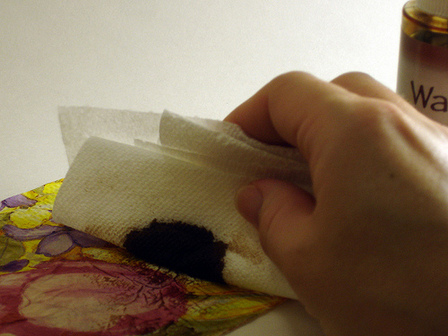 Now's a good time to add walnut ink or chalks if you're using them, since they won't stick well after we add the top layer of glue in the next step. If there are parts where the paperboard design is particularly showing through, concentrate your inks in that area to hide it.
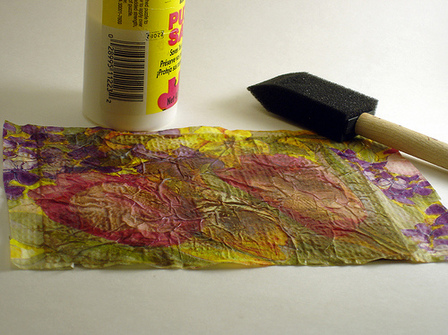 Let everything dry, then spread another layer of decoupage glue on top.
 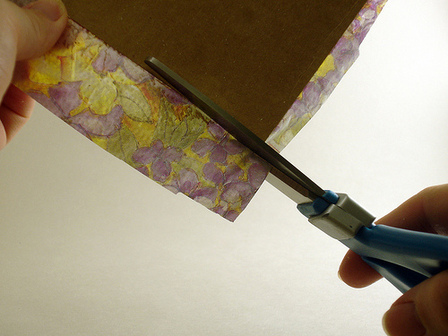 Let the glue dry again, then trim the edges so the tissue paper layer is the same size as the paperboard layer.
 Optionally, decorate the top by stamping or adding glitter. If you're stamping, you may want to use StazOn inks, since they're permanent on slick surfaces like Mod Podge. You could also repeat the above steps to add contrasting layers of tissue paper.
Variations / More Ideas

- I personally think the plain paperboard surface for the message area looks all earth-friendly... but if you'd prefer a more traditional look, you can glue white scrap paper on the back.
- These would be a great gift for a kiddo who's going to camp or a loved one who's going on vacation. Make a matching set for however many days they'll be away, then wrap them up with a coordinating ribbon. Go ahead and add stamps (postcards stamps are up to $0.28 now) to save them the trouble (and to make sure they don't have any excuses!)
- We had lots of personalized paper napkins left over from our wedding.You only need so many for keepsakes, so what do you do with the rest? Use this basic idea to create custom Thank You cards with the extras. OR, if you're doing a themed kids' party, buy an extra paper tablecloth and use it to make invitations.
I'd love to hear your ideas, too.
Note: You may have noticed I'm using bigger photos in my tutorials. Like it? Hate it? Take too long to load? Let me know if you have an opinion one way or the other.

Comments
Very pretty! I like it when you branch off into paper crafting territory. Big pics are nice, no prob loading.
Posted by: Ann | June 26, 2009 3:33 PM
I love what you have done! I also love the bigger pictures. I can see more of the details and the pretty paper that you used. Thank you for providing an excellent site.
Posted by: vmkb | June 27, 2009 9:02 AM
I like the big pictures. But I have to admit to just skimming the text, because the last thing I need is another potential craft supply to horde. Thanks for the warning :-)
Posted by: Lisa Clarke | June 27, 2009 12:57 PM
Thanks for the feedback... sounds like the big pics are here to stay, then. I'm not quite happy with the formatting, so I'll have to play with it a bit.
And you're welcome, I think, Lisa. Guess I shouldn't warn people not to read my blog posts after all. ;-)
Posted by: Angela Mabray | June 28, 2009 9:40 PM
I know, I was forewarned. My coworker just laughs because I dumpster dive everyday for discarded folders, any cardboard, those fancy $4 mylar balloons, etc. I live real close to a discount paper company - penny napkins, 50 cent tablecloths - the sky is the limit with this one. TFS
Posted by: DigiDeb | October 30, 2010 1:34 PM
Our monthly craft group is meeting at my house tomorrow and I have been saving cardboard and tissue paper for 2 months so we can do this! One last trip to the craft store today to make sure I have enough modge podge and foam brushes (and maybe a little glitter)! I can't wait to try it tomorrow!
Posted by: Laurie | February 25, 2012 11:09 AM